What are actions?
Actions
Sometimes the capabilities of PIM are not enough to meet all the complex business requirements of an enterprise. For example, you might need to add a special validation when editing a Product, enrich data when saving an item, or add a custom button to trigger desired behavior. This is where actions come to the rescue.
An action is custom logic written in JavaScript, which is executed on the server. To trigger the action, you need to set up a special event call – a trigger.
Creating an action
To create an action, go to Settings -> Actions. In the opened window, click the + button next to the list of actions.
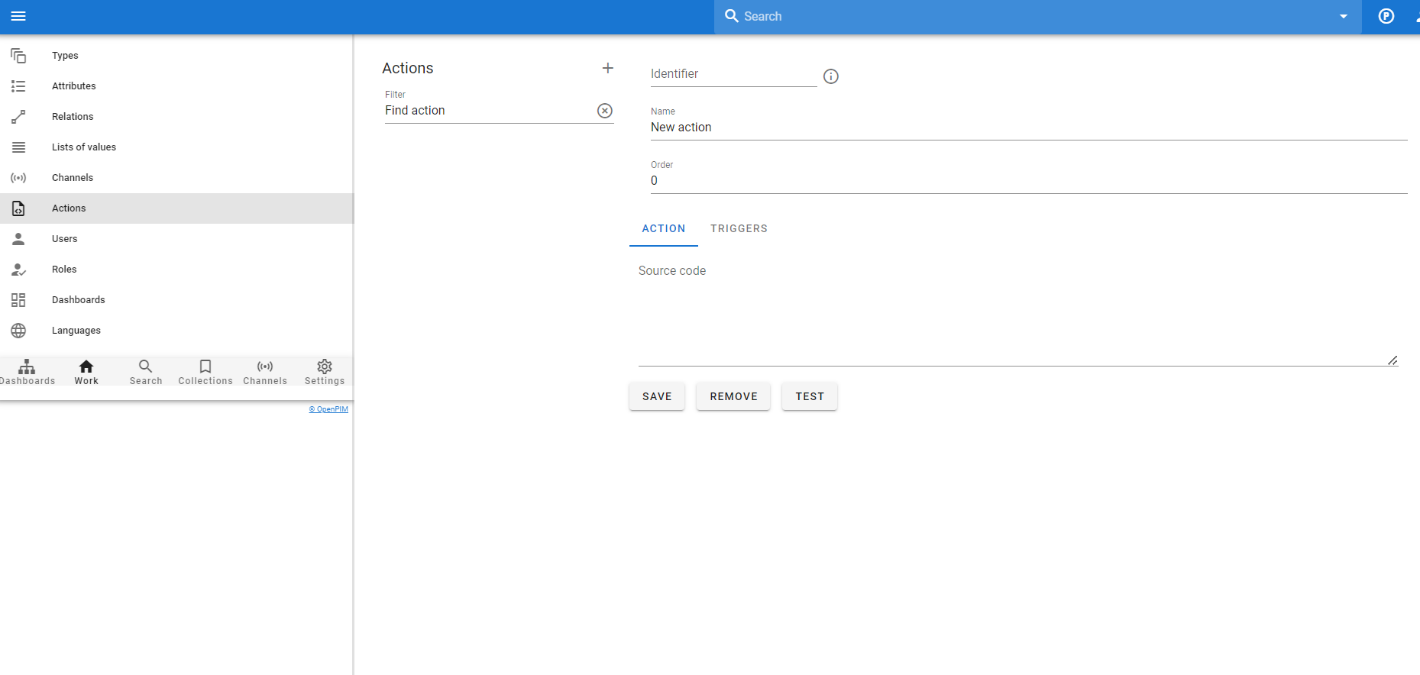
Next, you need to fill in the fields:
- A unique Identifier field (filled in with English letters), which serves as the action ID
- The Name field – this will help you search for the action in filters
- The Order field – specifies in which order your logic will be executed if there are several identical actions tied to the same event
Below, you will see two sections – ACTION and TRIGGERS. The ACTION section is a field where the logic – JavaScript code – will be placed. The TRIGGERS section is needed to add events that will trigger the action when they occur.
Triggers
For your custom logic to be executed, you need to configure triggers – special events that will cause the PIM server to call the logic. PIM supports various types of triggers. To add a trigger, move to the TRIGGERS section and click the + button.

In the window that appears, you must select the trigger type.
The following trigger types are supported:
- Object change
- Dependency change
- Button
- Attribute group
- Attribute
- Button (table view)
- Channel status change
- List of values
Let's look at each type in more detail.
Object change
The trigger is activated when an action is performed on an object in the PIM Data Model (e.g., an item). When selecting this type of trigger, you will see the following window:
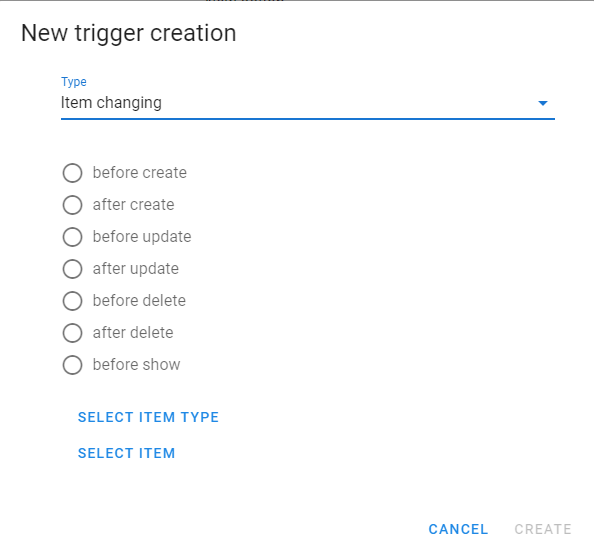
You must select one of the actions on the object that PIM will react to in order to trigger the action:
- before creation
- after creation
- before update
- after update
- before deletion
- after deletion
- before display
After that, select the object type to which the action call will apply. Click the SELECT OBJECT TYPE button and choose the appropriate type for the action from the tree. Next, you need to select the object in the object hierarchy tree from which the action will apply. This allows you to limit the applicability of the action to a specific list of objects, rather than all objects of that type. Click the SELECT OBJECT button and choose the root object from the window that appears.
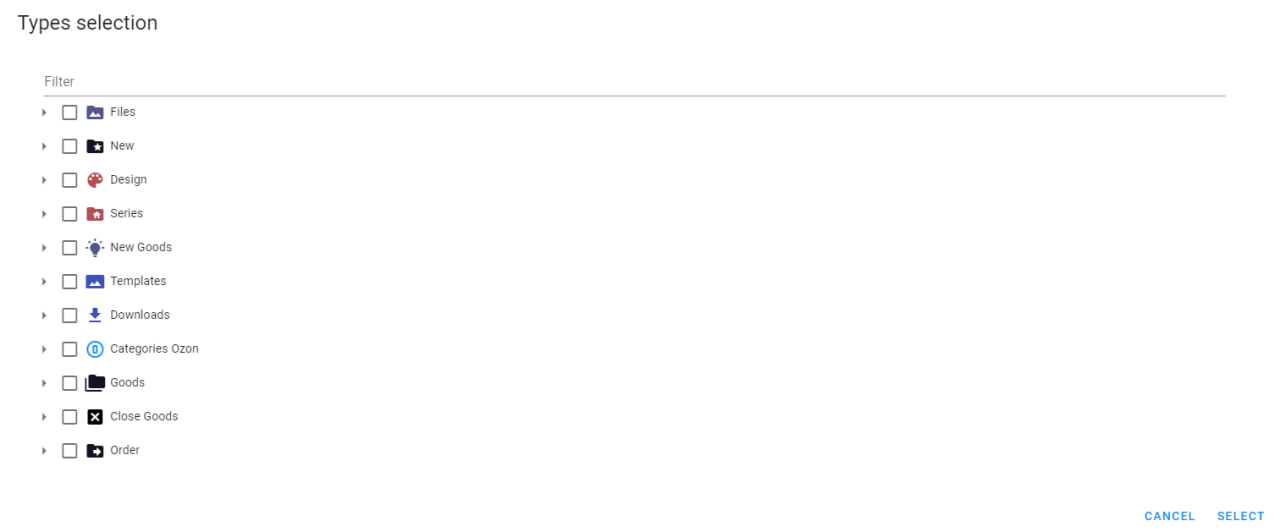
To complete the trigger creation, click the CREATE button.
Dependency change
The trigger is activated when an action is performed on a dependency in the PIM Data Model (e.g., the relationship between an item and its category). When selecting this type of trigger, you will see the following window:
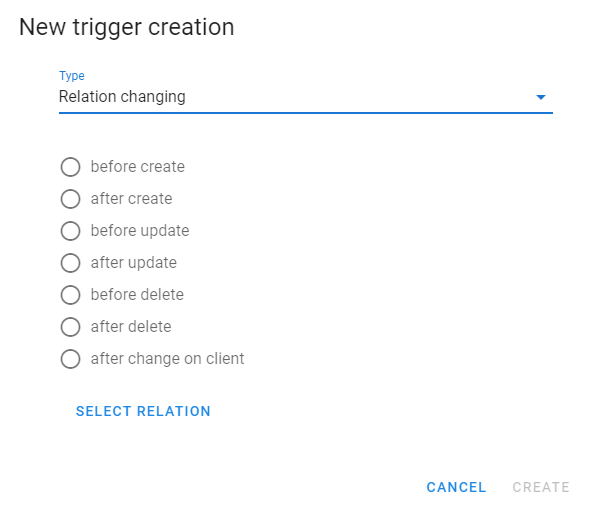
You must select one of the actions on the dependency that PIM will react to in order to trigger the action:
- before creation
- after creation
- before update
- after update
- before deletion
- after deletion
- after client-side change
After that, select the dependency type to which the action call will apply. Click the SELECT DEPENDENCY button and choose the appropriate type for the action.
To complete the trigger creation, click the CREATE button.
Button
When creating this type of trigger, a button will appear in the object card. When the button is pressed, the corresponding action will be triggered. When selecting this type of trigger, you will see the following window:
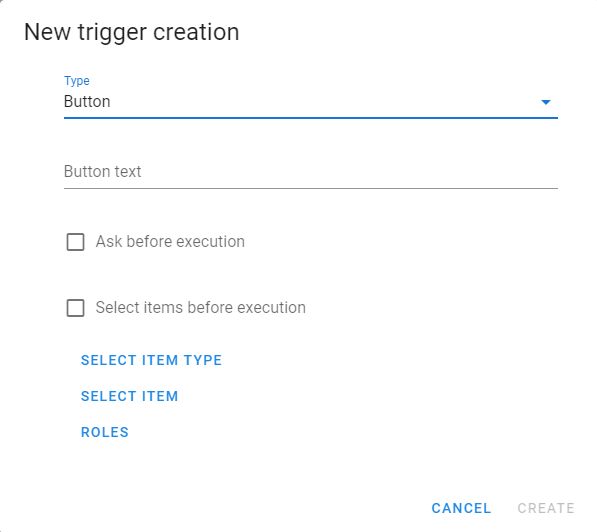
In the Button text field, enter what the user will see on the button.
You can choose the Request confirmation option, so after pressing the button, the user will be asked whether they really want to perform the action.
After this, select the object type for which the action call will apply. The button will be visible in the card of this object type. Click the SELECT OBJECT TYPE button and choose the appropriate type for the action from the tree.

Next, you need to select the object in the object hierarchy tree from which the action will apply. This allows you to limit the applicability of the action to a specific list of objects, rather than all objects of that type. Click the SELECT OBJECT button and choose the root object from the window that appears.
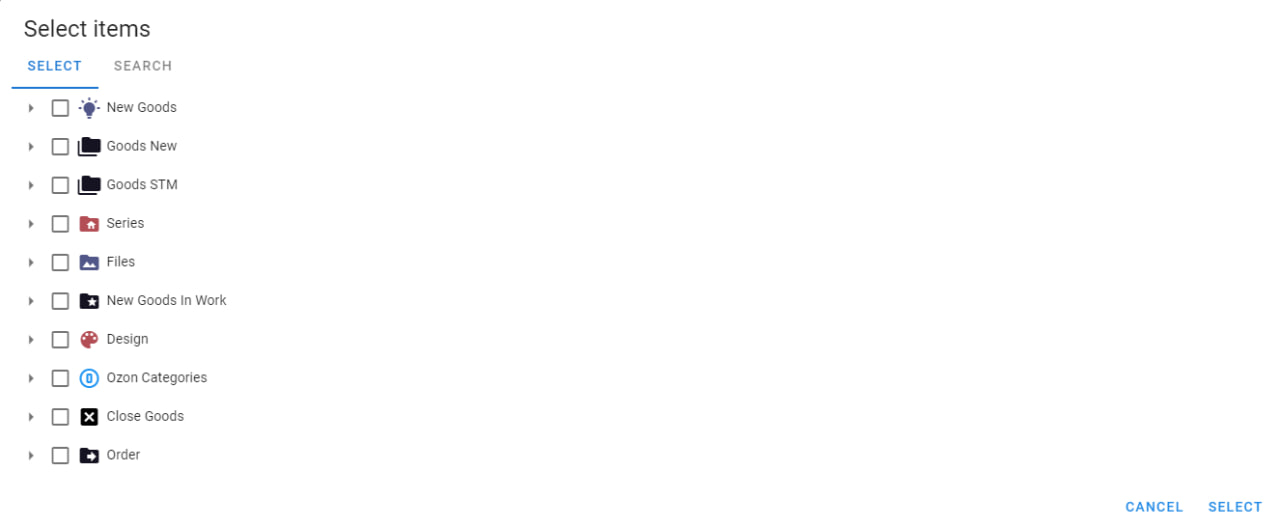
Optionally, you can select roles for which the action is applicable (only users with these roles will see this button). To select roles, click the ROLES button.
In the window that appears, select the list of roles and click the SELECT button.
Attribute group
The trigger is activated when an action is performed on the Attribute Group metadata. When selecting this type of trigger, you will see the following window:
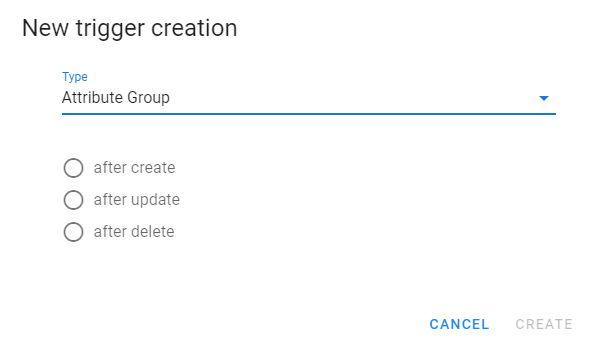
You must select one of the actions on the Attribute Group that PIM will react to in order to trigger the action:
- after creation
- after update
- after deletion
To complete the trigger creation, click the CREATE button.
Attribute
The trigger is activated when an action is performed on the Attribute metadata. When selecting this type of trigger, you will see the following window:
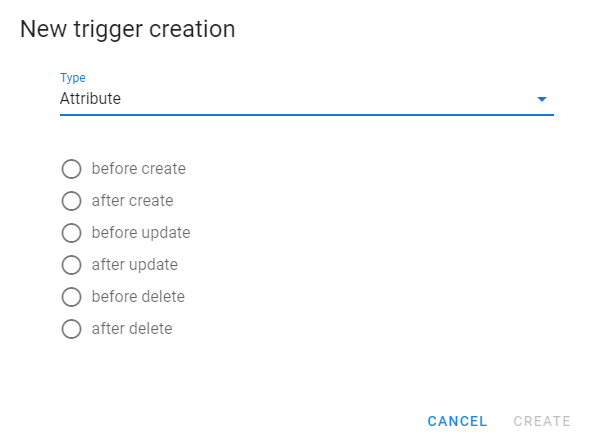
You must select one of the actions on the Attribute that PIM will react to in order to trigger the action:
- before creation
- after creation
- before update
- after update
- before deletion
- after deletion
To complete the trigger creation, click the CREATE button.
Button (in table form)
When creating this type of trigger, a button will appear in the search window. When the button is pressed, the corresponding action will be triggered. When selecting this type of trigger, you will see the following window:
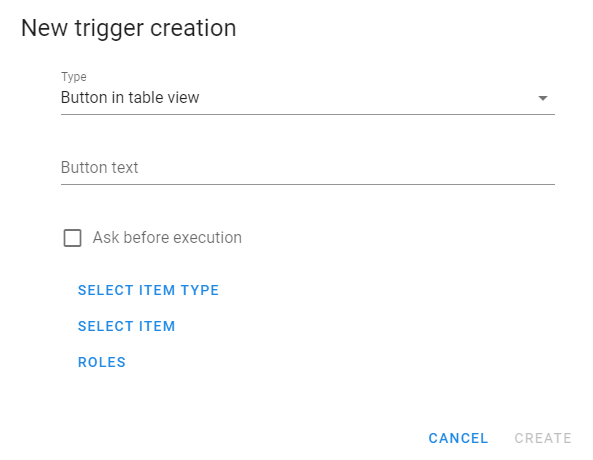
In the Button text field, enter what the user will see on the button.
You can choose the Request confirmation option, so after pressing the button, the user will be asked whether they really want to perform the action.
After this, select the object type for which the action call will apply. In the search window of this object type, the user will see the button. Click the SELECT OBJECT TYPE button and choose the appropriate type for the action from the tree.

Next, you need to select the object in the object hierarchy tree from which the action will apply. This allows you to limit the applicability of the action to a specific list of objects, rather than all objects of that type. Click the SELECT OBJECT button and choose the root object from the window that appears.

Optionally, you can select roles for which the action is applicable (only users with these roles will see this button). To select roles, click the ROLES button.
In the window that appears, select the list of roles and click the SELECT button.
List of values
The trigger is activated when an action is performed on the List of Values metadata. When selecting this type of trigger, you will see the following window:
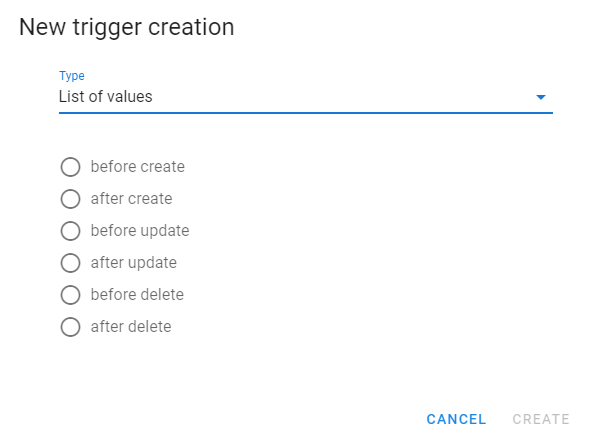
You must select one of the actions on the List of Values that PIM will react to in order to trigger the action:
- before creation
- after creation
- before update
- after update
- before deletion
- after deletion
To complete the trigger creation, click the CREATE button.
Source code
The logic of the action is written in JavaScript in the ACTION tab. When the server triggers the action, the context – the objects on which the action is performed – is passed to it. These objects can be accessed through JavaScript variables.
Context Variables
item – the object on which the action is performed
itemRelation – the relation on which the action is performed
values – object containing the modified attributes
channels – object containing the modified channels
models – object used for working with the database
You can learn more about the concept of models by visiting this link.
Currently, the following types of models are supported:
- item
- itemRelation
- lov
- channel
where – object that stores the search results, the result of executing a trigger of type Button in table view
lov – object that contains the list of values that have changed
changes – object that contains the list of values that have changed
event – the event object that triggered the action (for example: AfterCreate, AfterUpdate)
user – the username of the authenticated user
roles – list of roles associated with the authenticated user
system – useful system libraries (fs, exec, awaitExec, fetch, URLSearchParams, mailer, http, https, http2, moment, XLSX, archiver, stream, pipe, FS, KafkaJS, extractzip)
isImport – a flag that is true if the action is triggered via the API, and false if it was triggered from the user interface
Structure of Context Variables
Item is a JSON object with the following structure:
{
  "id": "23",
  "path": "1.2.3.23",
  "identifier": "america_standard_16a_germany_socket_with_italian_socket_combination",
  "name": {
    "en": "America Standard 16A Germany Socket with Italian Socket Combination"
  },
  "typeId": "4",
  "values": {
    "moq": "For regular packaging, MOQ500PCS/model",
    "oem": true,
    "tag": [1],
    "size": "118mm*72.5mm",
    "brand": "",
    "color": 1,
    "model": "118-KL18 series",
    "style": "american style",
    "sample": "Free",
    "addDesc": {
      "de": "",
      "en": ""
    },
    "compAll": 89.47,
    "current": "16A",
    "voltage": "110V~250V",
    "mainComp": 60,
    "material": "Panel: golden aluminum",
    "packaging": "Regular: 1pcs/non-woven bag, 10pcs/box, 100pcs/carton",
    "description": {
      "en": "Good Quality One Gang Electrical Wall Switch and Socket"
    },
    "additionComp": 100,
    "logisticComp": 100,
    "delivery_time": "15-25 days after deposit, according to the quantity"
  },
  "channels": {},
  "mimeType": "",
  "fileOrigName": "",
  "createdBy": "admin",
  "createdAt": "2020-09-18T10:35:14.630Z",
  "updatedBy": "admin",
  "updatedAt": "2023-11-21T08:29:34.663Z"
}
2
3
4
5
6
7
8
9
10
11
12
13
14
15
16
17
18
19
20
21
22
23
24
25
26
27
28
29
30
31
32
33
34
35
36
37
38
39
40
41
42
43
itemRelation is a JSON object with the following structure:
{
  "id": "5",
  "identifier": "rel_america_standard_16a_germany_socket_with_italian_socket_combination",
  "relationId": "1",
  "createdBy": "admin",
  "createdAt": "2020-09-18T10:36:52.351Z",
  "updatedBy": "admin",
  "updatedAt": "2020-09-18T10:36:52.351Z",
  "itemId": "23",
  "targetId": "55",
  "values": {}
}
2
3
4
5
6
7
8
9
10
11
12
Code Examples
Here are some useful code examples for action development:
Attribute Change (Object Change Trigger – Before Update)
item.values.CNSiteMVP = true
item.changed('values',true)
2
Attribute Change (Object Change Trigger – After Update)
item.values.CNSiteMVP = true
item.changed('values', true)
await item.save()
2
3
Finding All Matching Objects in PIM
const items = await models.item.findAll({ where: { parentIdentifier: { [Op.in]: ids }, values: { EDActive: true } } })
Finding the First Matching Object in PIM
const object = await models.item.findOne({where:{id: ngkId}})
For more information about querying objects using models, check out this link.