What are the Roles?
Introduction
The system includes functionality that allows detailed customization of access to view and edit data, as well as the ability to restrict actions that a user can perform.
For example, if you need to create a user with access to edit data type A but not data type B, this can be configured using roles.
Role Configuration
By navigating to the "Roles" tab in settings, you can create a role to restrict access to data. Detailed settings are divided into the following tabs:
For Data
Configuring restrictions for various data types starts in this tab. Several sections are available here to introduce restrictions:
- Restrictions for Types
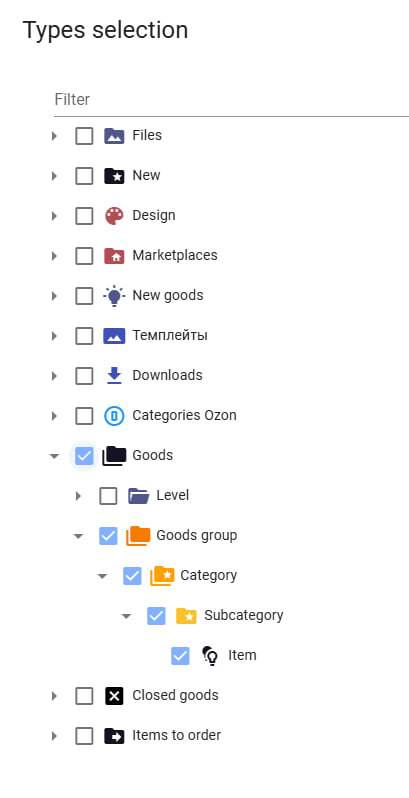
In this section, you select the data types for which restrictions will be applied. It’s important to note that when choosing a specific level to apply restrictions to, you may need to select all higher levels. For example, if a user needs access to edit the "Product" data type, you must select all preceding levels: "Product Category" and "Products."
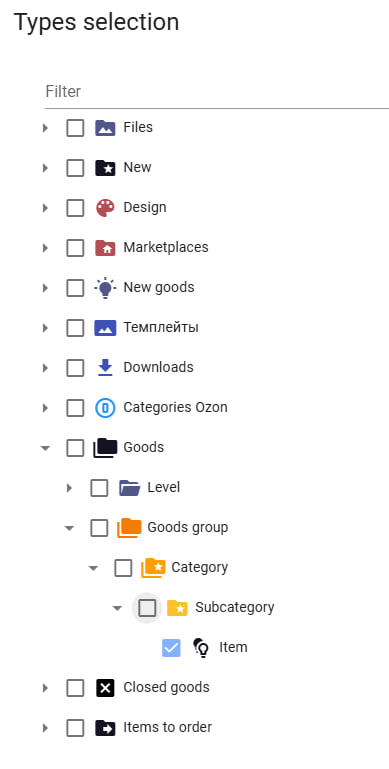
If the task is to restrict access for a specific user to certain data types, you only need to select those types. For example, to restrict access to editing "Products," simply select the desired data type.
- Starting From
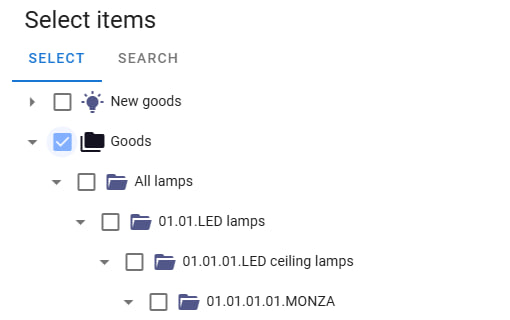
This section allows applying restrictions to entities developed in the system. The data types specified in the "Restrictions for Types" section will be applied to existing objects in the system. For instance, to grant access to edit the "Product" data type, you must select the top-level folder containing the products in the "Starting From" section.
- Access
The "Access" section allows setting one of three levels of access:
No Access
Complete restriction of access to the specified data types. The user will not see the selected types in the system.Read-Only
Access is limited to viewing the selected data types. In this mode, the user can view but cannot edit the selected data.Full Access
The ability to view and edit the selected data types. The user can make changes to the specified data types.
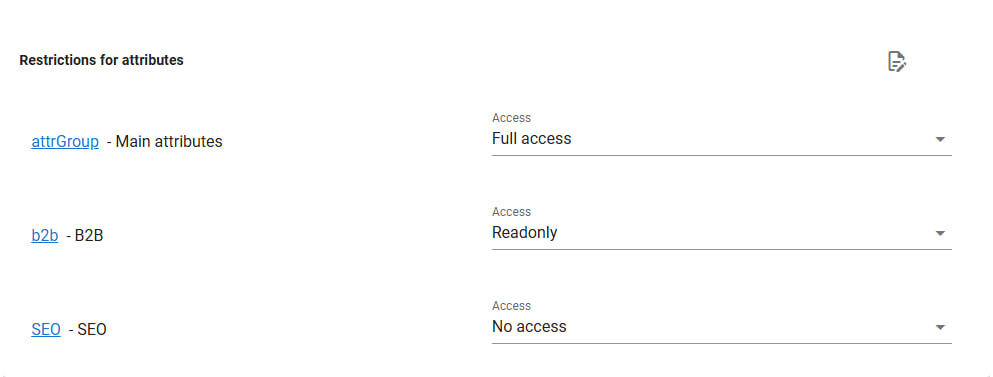
- Attribute Restrictions
This section allows selecting groups of attributes to impose corresponding restrictions. You can specify groups that can be edited, viewed only, or completely inaccessible.
For Dependencies
- Dependency Restrictions
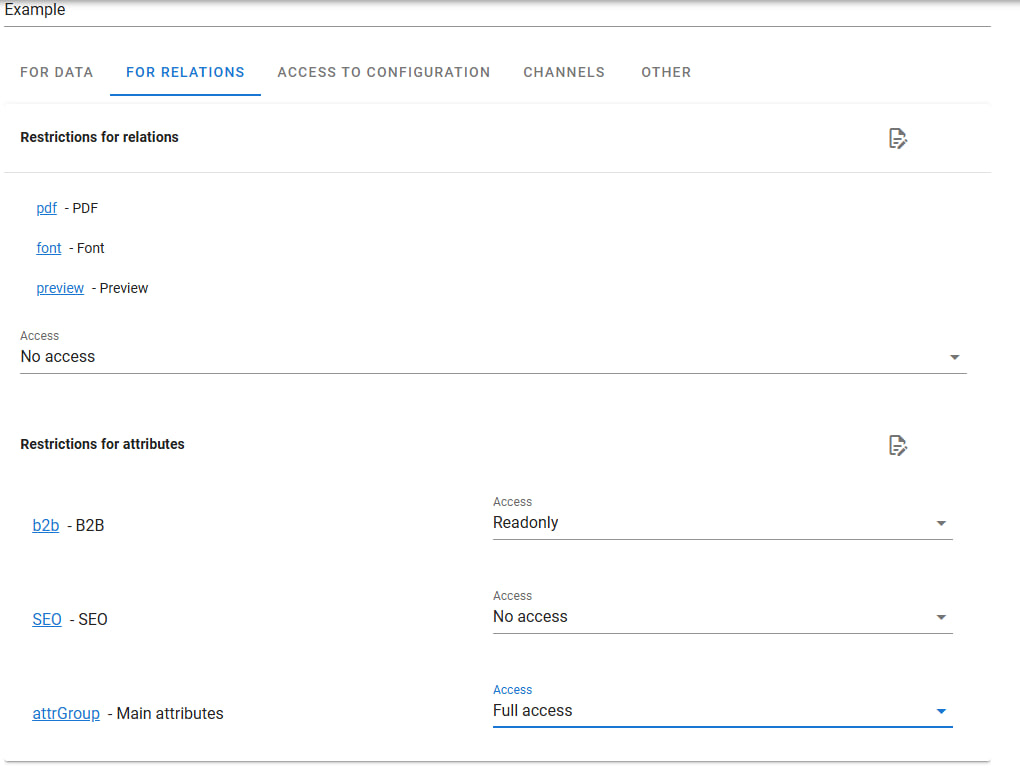
This section lets you select dependencies to which restrictions will apply. After selecting the necessary dependencies, you must set an "Access" value. These values follow the same logic as the "Access" section in "For Data" -> "Access." One of the three access levels will apply to all selected dependencies.
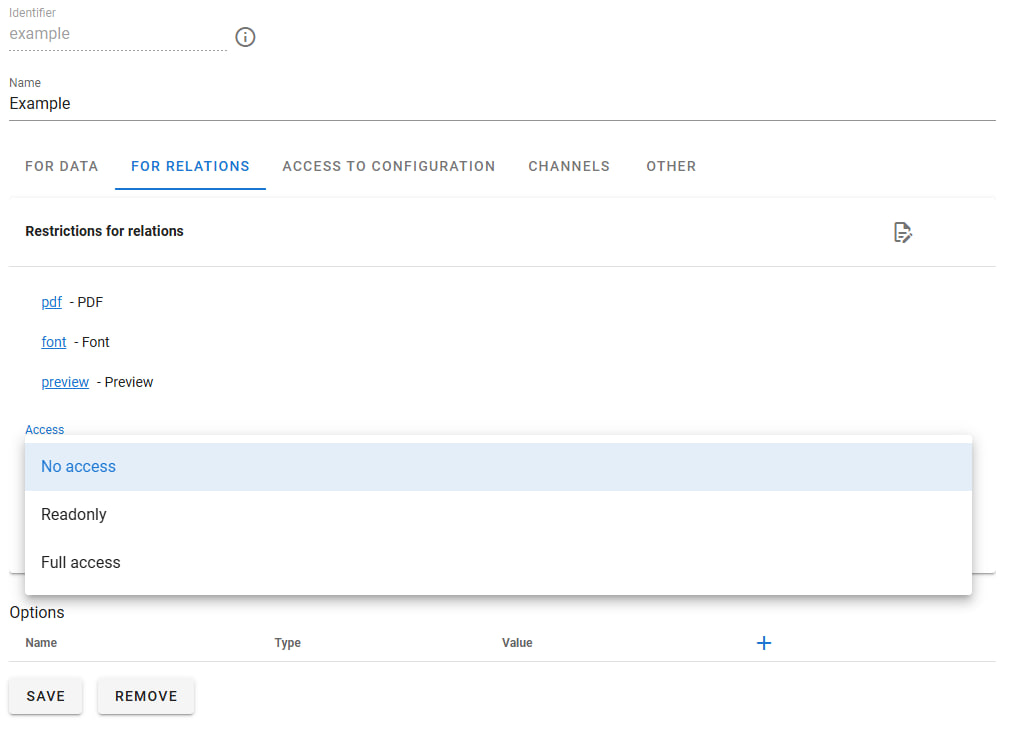
- Attribute Restrictions This section allows selecting attributes associated with the chosen dependencies to impose restrictions, similar to "Attribute Restrictions" in the "For Data" tab. However, in this tab, attributes are linked to dependencies, not entities as in the previous tab.
For instance, if a product has dependencies with multiple images and the dependency has an attribute "Order Number," you can grant access to edit this attribute to change the order numbers of these dependencies.
Access to Settings
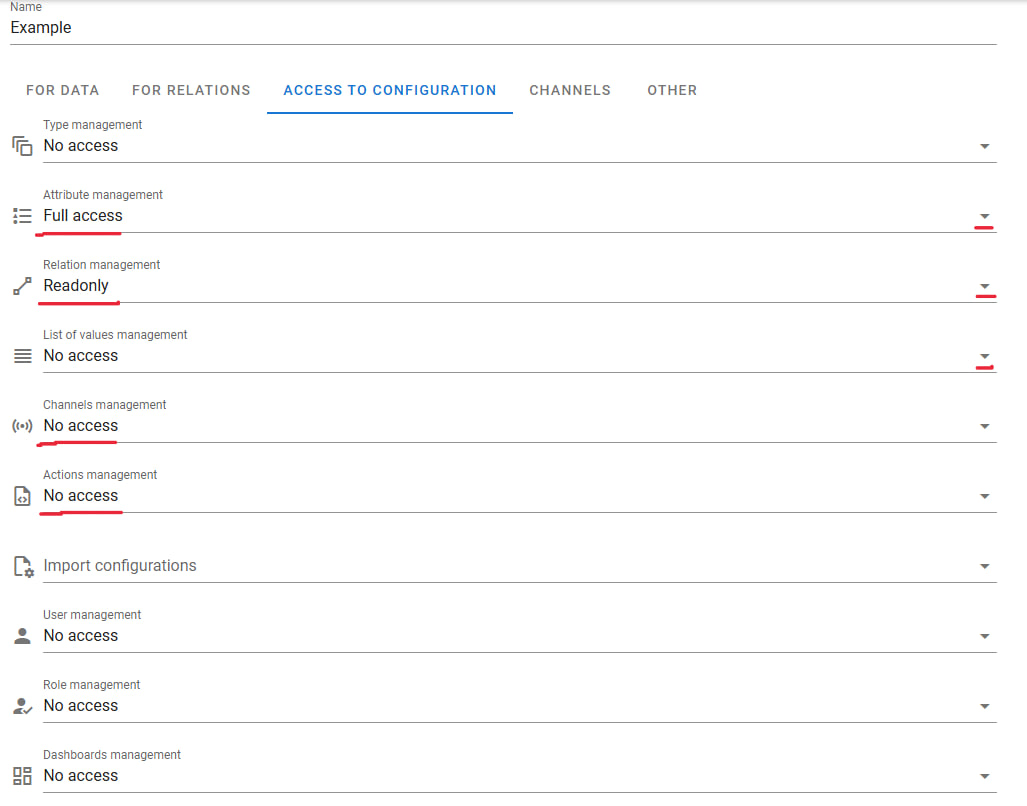
Access to various settings can be restricted for each user. The system can limit access to specific settings menus based on "Attribute Restrictions" principles, offering one of three access levels. For example, a user may be allowed to create and edit attributes, view existing dependencies in the system, but be restricted from viewing channel settings and other data. In such cases, access settings would look like this:
Channels
This tab contains a single section: "Channel Restrictions." Its usage and editing are identical to the "Attribute Restrictions" section. You can select any available channel in the system and assign the required restrictions to a user:
- No Access - the channel will not be visible to the user.
- Read-Only - the user can only view the results of uploads.
- Full Access - the user can independently send data to the channel.
Other
This tab contains settings for auxiliary tools in the system. Access can be granted or denied for each tool. Let’s review each tool:
Change History
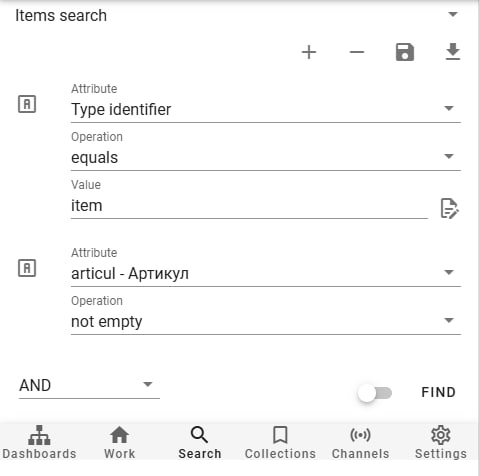
The user can view the change history of system entities: when a product was sent to a channel, which user initiated the channel operation, etc.Search
The search tool enables users to find any data in the system using the built-in interface or expressions. For example, to find products of a specific type with a certain attribute filled, compose a query in the "Search" tab like this:
- Export to XLS
This function allows exporting data from the system in .xls format. For example, to export all products under a certain category in one table, use this feature.

- Import from XLS
Importing enables uploading data into the system from a .xls file.
For instance, to quickly fill one attribute for multiple products, first find all necessary products using the "Search" tool, then export them using the "Export to XLS" function.

In the exported table, fill in all required values and import the edited file into the system. After a successful import, the system will update the edited data, and you can download a change report.
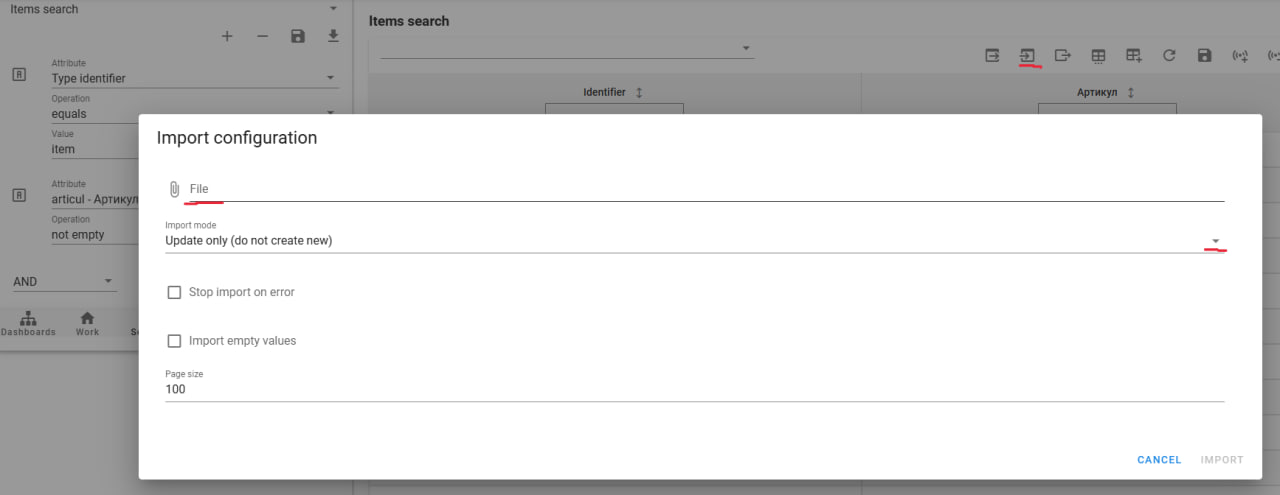
If the data import fails, an error message will be displayed, and you will have the option to view the upload log.
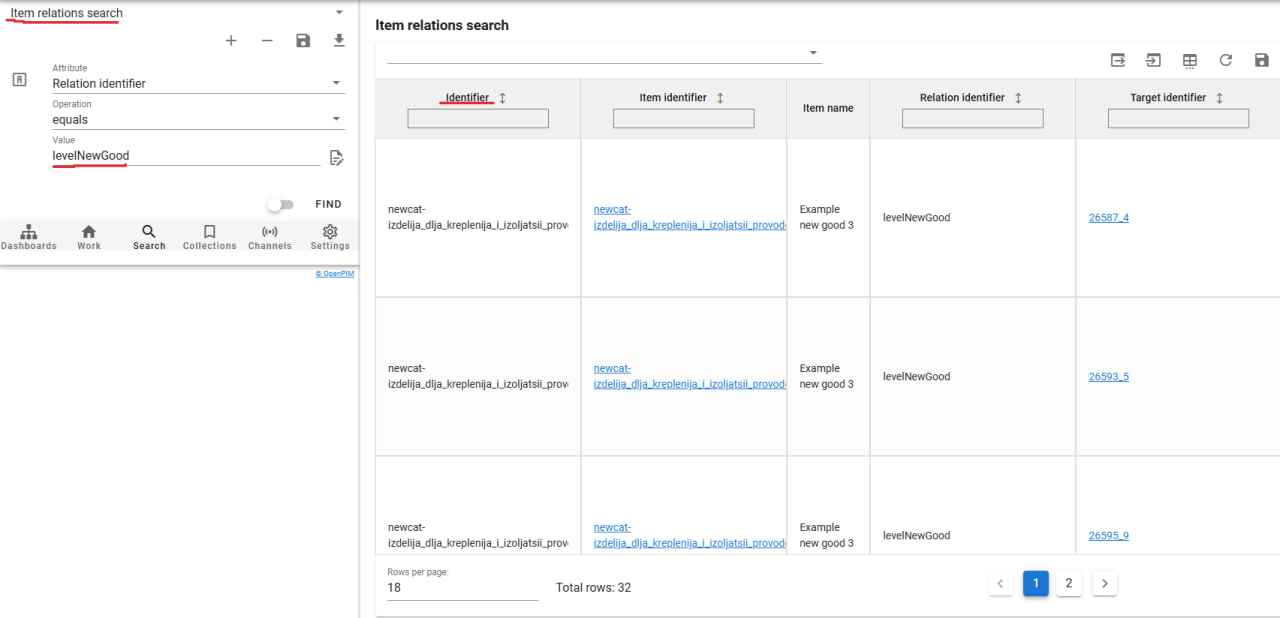
- Dependency Search
Dependency search works similarly to "Search" but searches for dependencies created in the system instead of entities.
Export Dependencies to XLS
Dependency export follows the same logic as exporting entities, described in the "Export to XLS" section.Import Dependencies from XLS
Dependency import follows the same logic as importing entities, described in the "Import from XLS" section.
Users
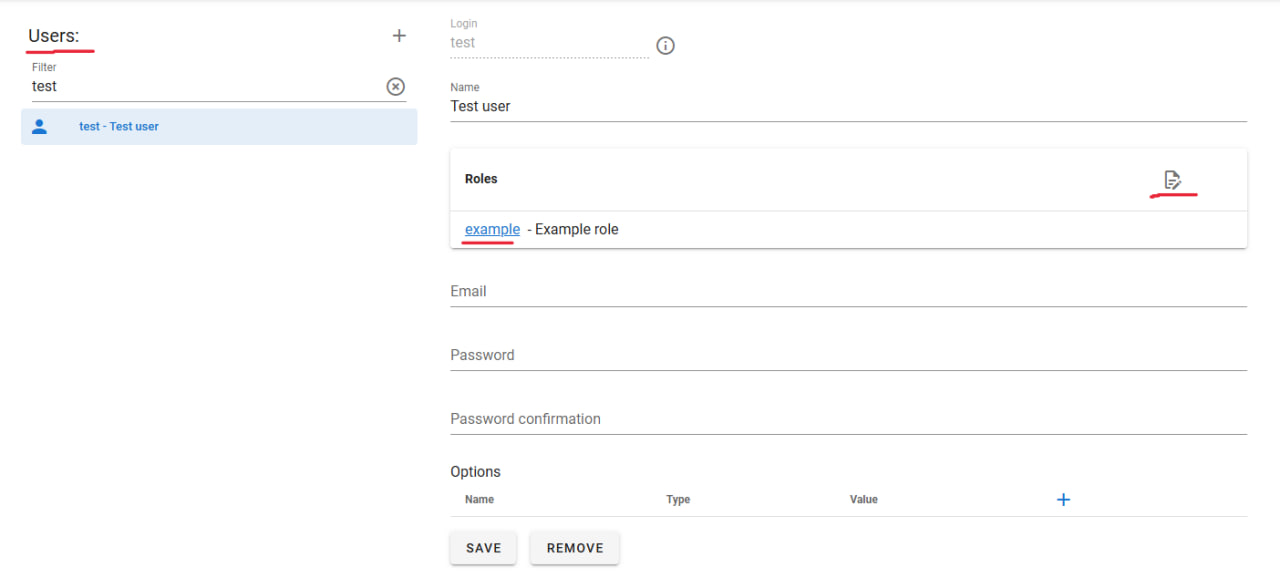
Roles created must be assigned to existing users in the system. This action is performed in the "Users" section of the settings. To assign a role to a user, select the user and choose the required role in the "Roles" section. Once changes are saved, the user will receive the permissions or restrictions provided by the selected role.
It often happens that when configuring access, it is necessary to create multiple roles at once. For example, if you need to restrict a user’s access to all data in the system but allow them to edit a specific group of attributes, you will need to create two roles: the first will restrict access to everything, and the second will grant access to editing. If one role contradicts another (e.g., one denies access to editing a group of attributes while the other allows it), priority is given to the role that grants access.
