What are channels?
Introduction
Channels in the OpenPIM system are represented as executable modules created in any programming language. A channel works with records and allows you to export, transform, and transfer records from the OpenPIM system to a file or another external system.
Sending records to a channel
Records can be sent to a channel one at a time or several at once from the tabular view, which is available for records with nested records or from the search results page. To send a single record to a channel, select the Send to Channel option in the Send menu:
In the new window, select a channel from the list of available channels and click Select:

After this action, the record will automatically be sent to the selected channel.
To send a large number of records to a channel, use the tabular form of record display, for example, in the record search mode. Search for records in the OpenPIM system according to the criteria that interest you. In the header of the table with the search results, select the Send icon and the Send to Channel option:
In the new window, select a channel from the list of available channels and click Select:

After sending the records to the channel, they are assigned an attribute with the channel name and processing status. The following channel record processing statuses exist:
- Status Queued: The record has been sent for processing
- Status OK: The record was successfully processed
- Status Error: An error occurred while processing the record
Channel User Interface
You can view channel information in the Channels section, which is available in the main menu of the OpenPIM system:
The following information is available in the Channels section:

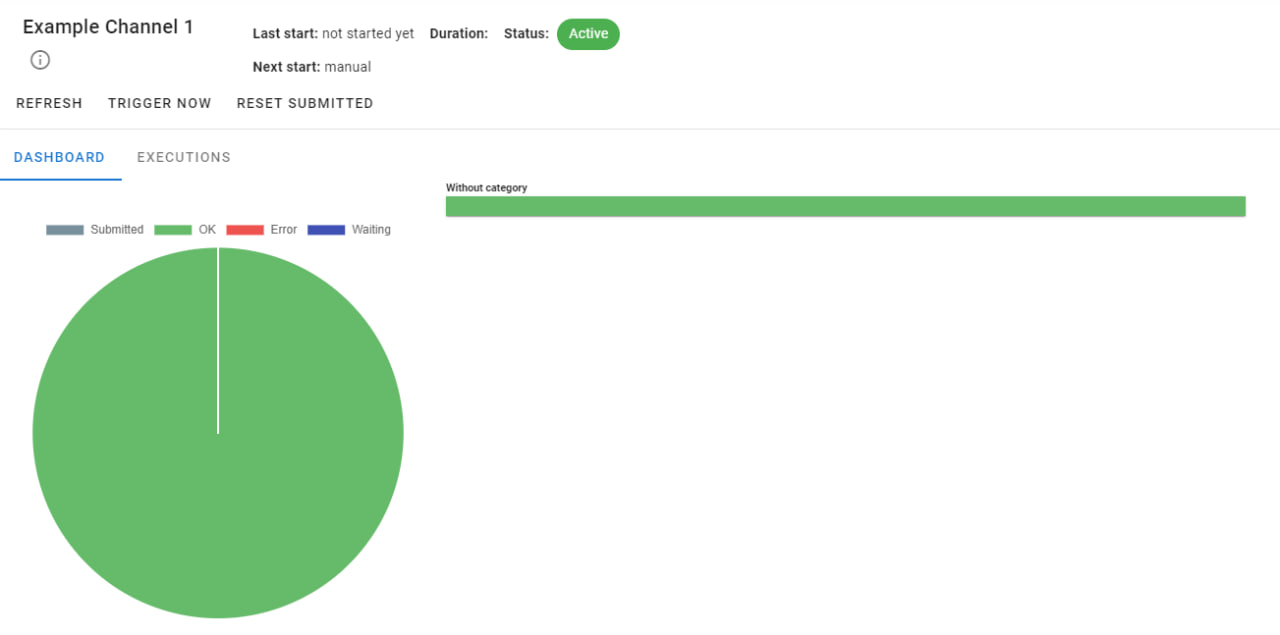
Dashboard: Displays the status of records sent to the channel
Executions: Contains a list of channel executions with start and end times, status for each execution, a link to the channel's result file, and information on the execution process. In this section, the following actions with the channel are available:
Refresh: Allows you to update the channel status data
Run: Manually starts the channel
Clear queue: Resets the send attribute for all records in the queue of this channel.
Channel Settings
Creating and configuring a channel is done in the Settings section, which is available in the main menu of the OpenPIM system:
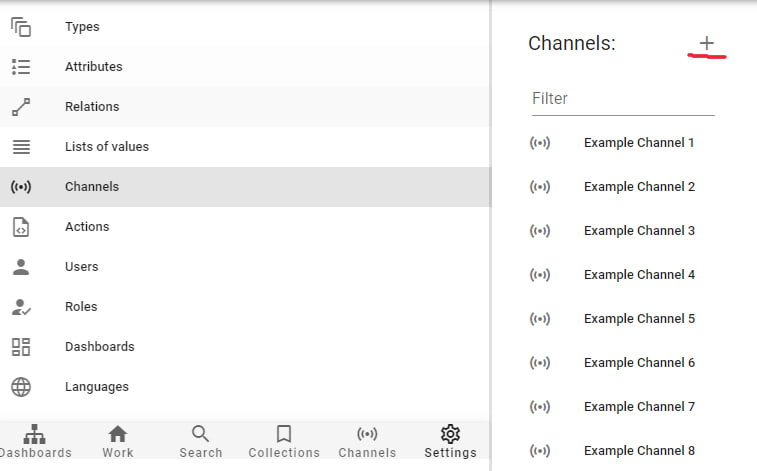
After navigating to the Settings section, select Channels from the menu on the left side of the screen:

When you select Channels, a list of existing channels for editing and the option to create a new channel is available on the right side of the screen. To create a new channel, select the + symbol next to the name Channels:

When creating a new channel, you need to specify the following values:
- Identifier - the unique identifier of the channel.
- Name - any name for the channel
- Properties tab
- Select Active for the new channel
- Select the channel type from the list. For the basic system version, the External channel type is available
- Select the channel's run mode from 4 possible options
- Specify which system object types this channel will be available for
- Specify at what system object level this channel will be visible
- Select Show channel status on the object to display the channel status in the product card
- Configuration tab
- Specify the full path to the executable program in the Executable Program field
- Specify the filename in the Generated Filename field, which will be generated as a result of the successful channel execution
- Specify the MIME type for the file in the MIME type of generated file field, which will be generated as a result of the successful channel execution
Example channel
Let's consider the creation of a new executable module for a channel in Node JS as an example. To start the channel, you need to select all the records in the database that were sent to the channel. To do this, follow these steps:
- Create a connection to the database. In the example below, a connection is created to the "openpim" database for a process running in a Docker container to the database server running on the same host as the Docker container. The connection uses the user "postgres" with the password "sa".
import * as pg from 'pg'
const { Pool } = pg.default
const pool = new Pool({
  host: '172.17.0.1',
  database: 'openpim',
  password: 'sa',
  user: 'postgres',
  port: '5432'
})
2
3
4
5
6
7
8
9
- Select all records from the items table that have been marked as sent to the channel. The search is conducted by the channel identifier ('channel_identifier') and status equal to 1, which means the record has been sent to the channel. The channel identifier can be found in the channel settings. The query result is returned in JSON format, where the found records are available in the "rows" field.
const channel = 'demoChannel'
let sql = `
  SELECT i.*
  FROM items i
  WHERE i.channels##>>'{${channel}, status}' = '1'
  `
const itemsForProcessing = await pool.query(sql)
console.log(`Found ${itemsForProcessing.rows.length} items for processing in the channel.`)
2
3
4
5
6
7
8
9
- Process the list of received records. The example uses the (writeItemsToCSV) function to create a CSV file. This function receives an array of records found in the previous step (itemsForProcessing.rows). The name of the output file is passed from the channel settings (the "Generated Filename" field).
const fs = require('fs')
const path = require('path')
const { parse } = require('json2csv')

// Function to write the itemsForProcessing array to a CSV file
function writeItemsToCSV(items, outputFilePath) {
	// Define CSV header
	const fields = ['identifier', 'name']
	opts = { fields }
	try {
		// Convert array to CSV format
		const csv = parse(items, opts)
		// Write data to the file
		fs.writeFileSync(outputFilePath, csv)
		console.log('CSV file successfully created:', outputFilePath);
		return true
	} catch (err) {
		console.error('Error creating CSV file:', err);
		return false
	}
}

// Call the function to process the records
const processingResult = writeItemsToCSV(itemsForProcessing.rows, outputFilePath);
2
3
4
5
6
7
8
9
10
11
12
13
14
15
16
17
18
19
20
21
22
23
24
- At the end of processing the records, you need to update the record statuses to the following values:
- status = 2: means the record was successfully processed by the channel's executable module.
- status = 3: means an error occurred while processing the record.
- As an example, you can use the value returned by the writeItemsToCSV function and set the appropriate status value for all records in the array.
if (processingResult) {
    itemsForProcessing.rows.forEach(item => {
    const sql1 = `update items set channels = jsonb_set(channels, '{${channel}}', channels->'${channel}' || '{"status" : 2, "syncedAt" : ${Date.now()} }') where identifier = '${item.identifier}'`
    pool.query(sql1)
    })
}else {
    itemsForProcessing.rows.forEach(item => {
    const sql1 = `update items set channels = jsonb_set(channels, '{${channel}}', channels->'${channel}' || '{"status" : 3, "syncedAt" : ${Date.now()} }') where identifier = '${item.identifier}'`
     console.log(`DEBUG: sql = ${sql1}`)
     pool.query(sql1)
    })
}
2
3
4
5
6
7
8
9
10
11
12
The channel execution results are available in the Channels -> [Channel Name] -> Executions section :

You can find the demo channel code at the link. To run the demo channel, follow these steps:
- In the OpenPIM system settings, create a new channel with the following characteristics:
- Properties tab
- Identifier: demoChannel
- Name: Demo Channel
- Active: Selected
- Type: External
- Channel run manually
- pecify types and visibility based on the data model
- Show channel status on object: selected
- Configuration tab
- Executable program: node /filestorage/jobs/demoChannel/demoChannel.js {outputFile}.
- Generated filename: demoProducts.csv
- Mime type of generated file: text/csv
- Properties tab
- Save the changes for the new channel.
- Copy the contents of the archive to the server directory. The Docker container running the OpenPIM system uses a local directory mapped to /filestorage in the Docker container. In this local directory, create a new "jobs" directory and a directory for the channel: "demoChannel", where you will copy the archive content.
- In the OpenPIM system's user interface, go to the Channels section, select Demo Channel, and click Run.