Types
Introduction
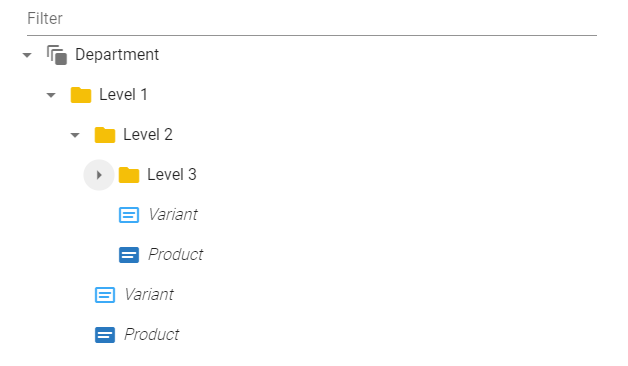
Types define what kind of entities or objects you have in your system. Let's imagine you have the following structure on your website:
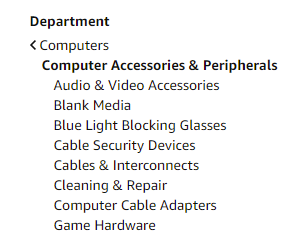
This means that at the top level, you have Department, then 3 levels of hierarchy, and then your products.
Let's login into the system and configure it to store such information. First, we need to login, and go to the system Settings -> Types. Let's click + button and add new type:
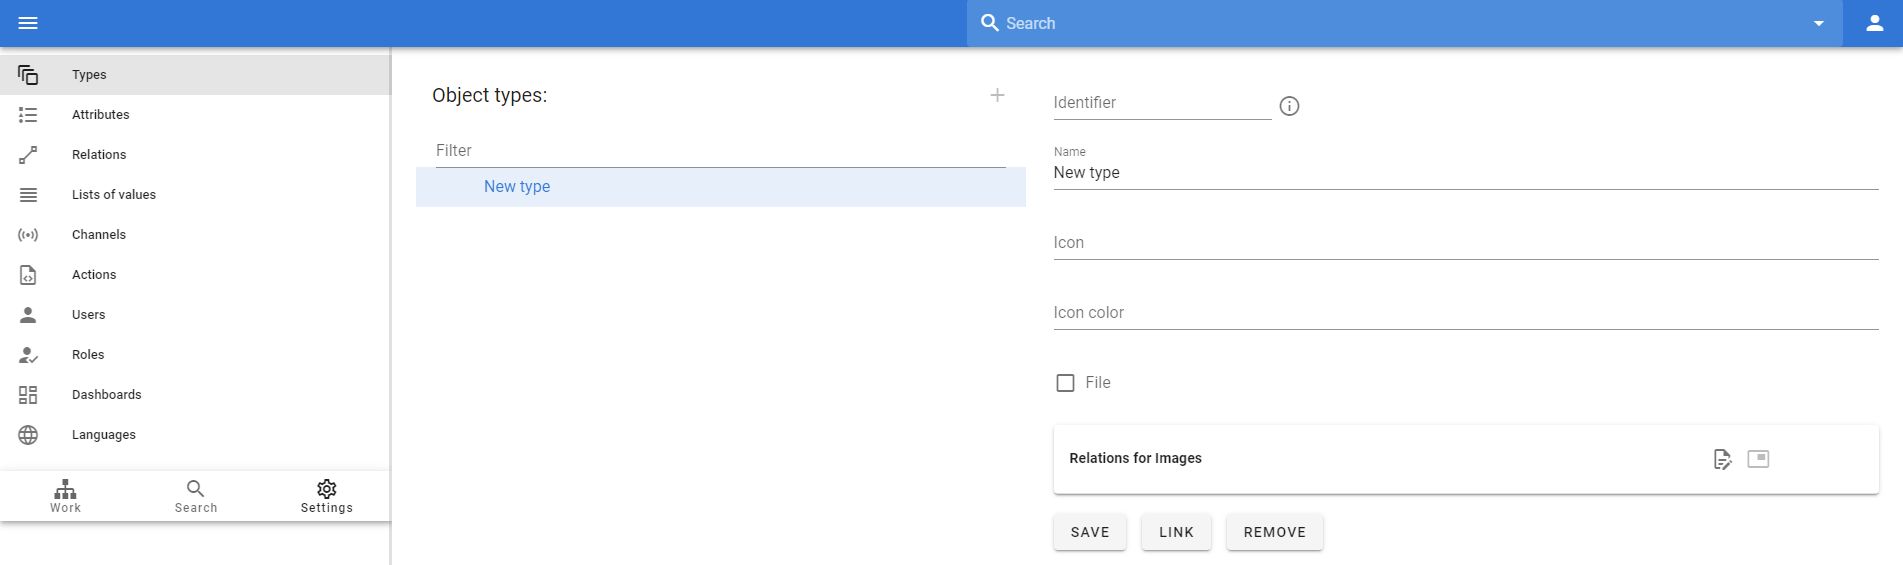
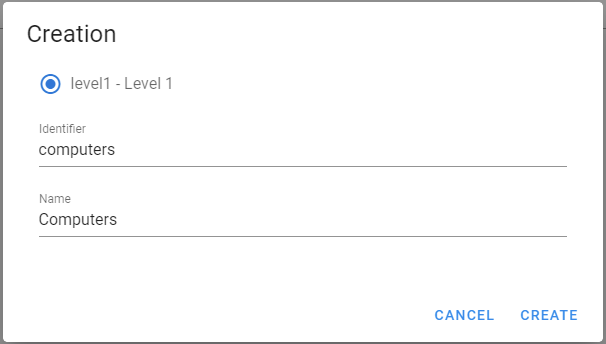
You must configure Identifier first. Each object in the system has an identifier. An identifier is a unique string, without spaces or special characters, that points to this particular object. It will be used later on import / export to identify your objects.
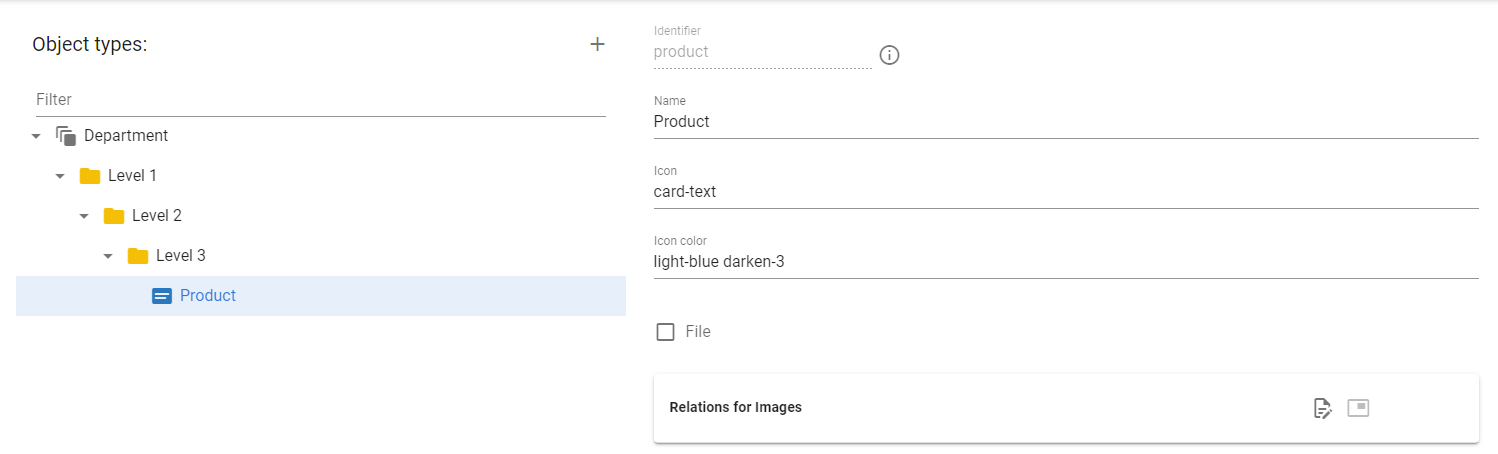
Let's configure our Department object and click Save to store this configuration:
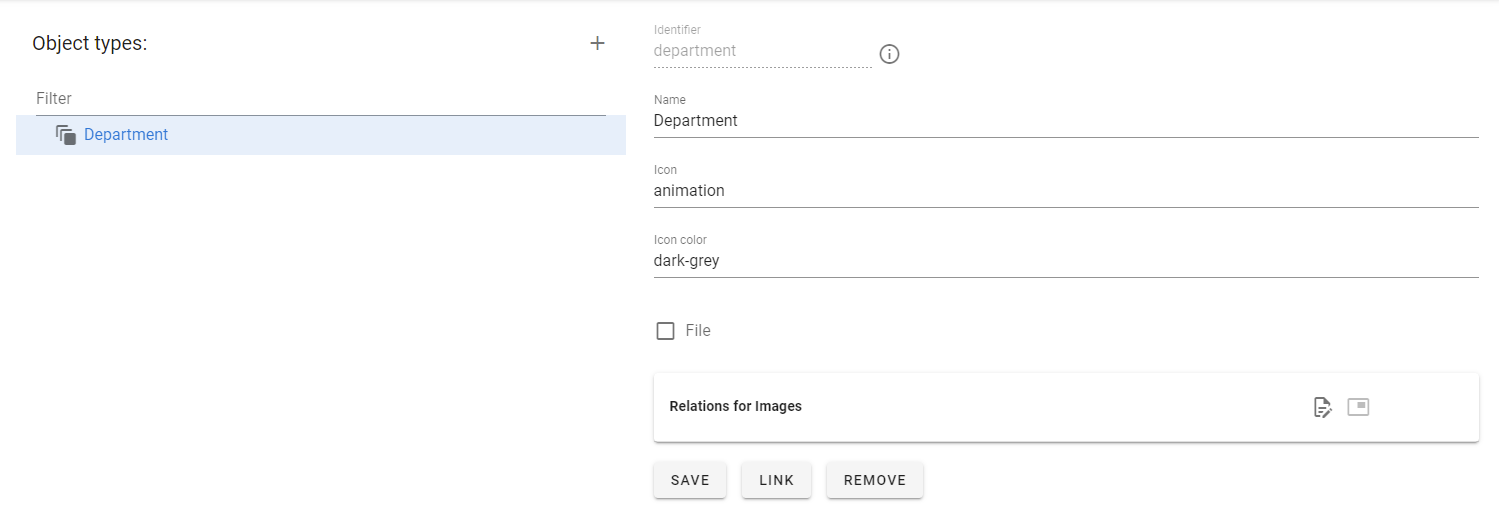
You have the ability to define an icon to be associated with this object. You can select icon name from Material Design Iconsopen in new window.
And you can specify the color of the icon used. You can select color name from Available Colorsopen in new window.
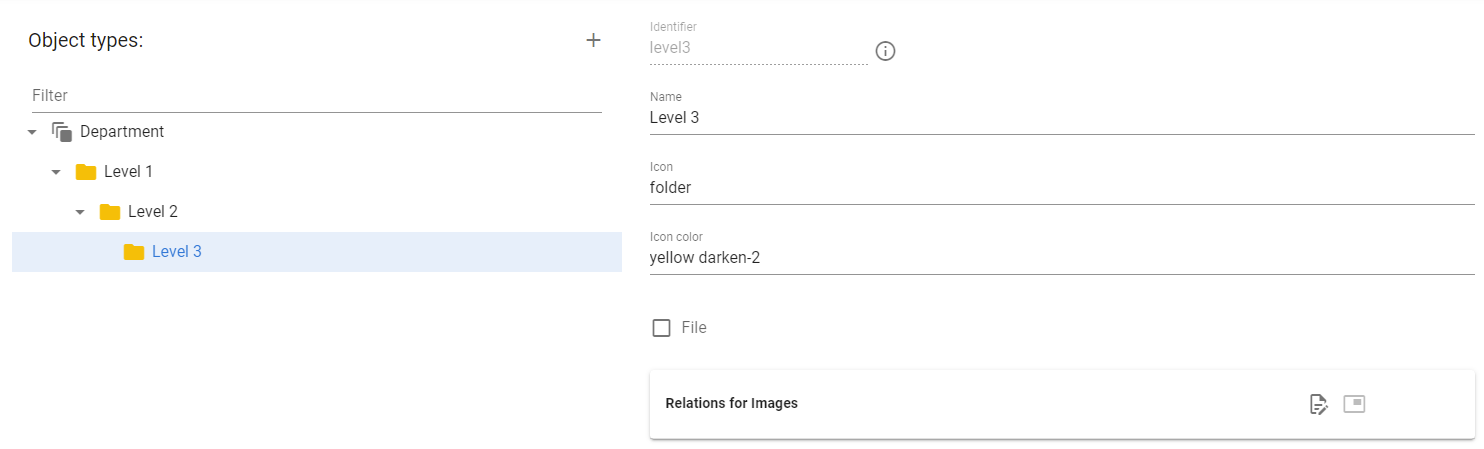
Then we have 3 levels of hierarchy in our data model. Let's add them one by one using the same approach.
And the last one is the product:
Now when we have our data model defined, let's go to the Work area and add the data that we have on our website. First, we can click at + button and add our department:

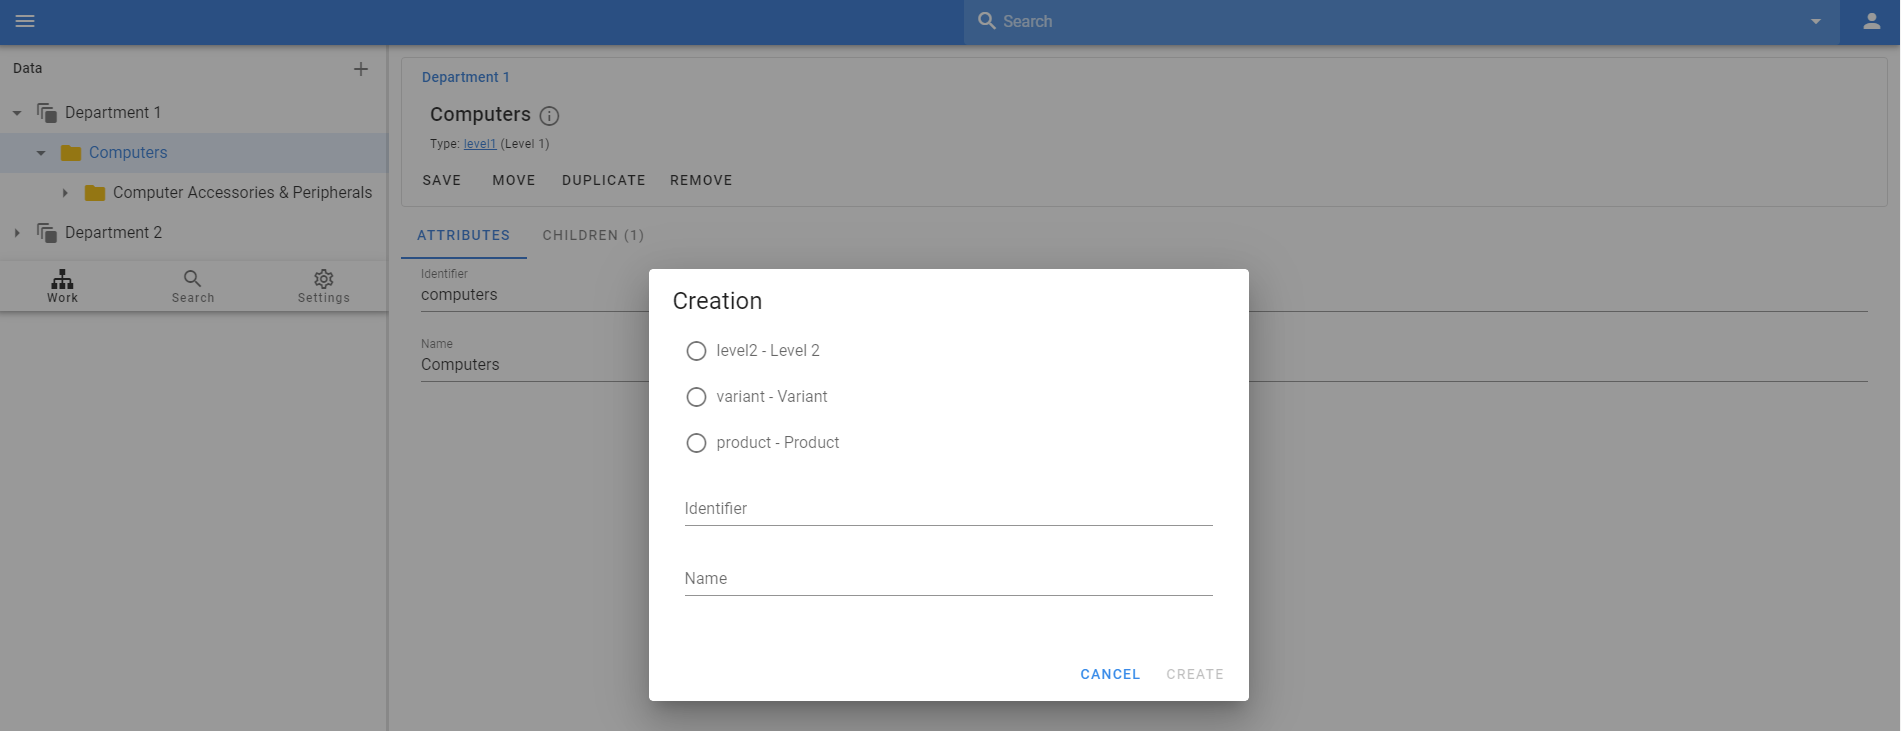
Then, when we are at the Department 1 node, we can go ahead and add another structure. Note that when you are at the department level, the system only allows you to add Level 1 nodes because we defined this in our data model.
Let's fill the whole structure.
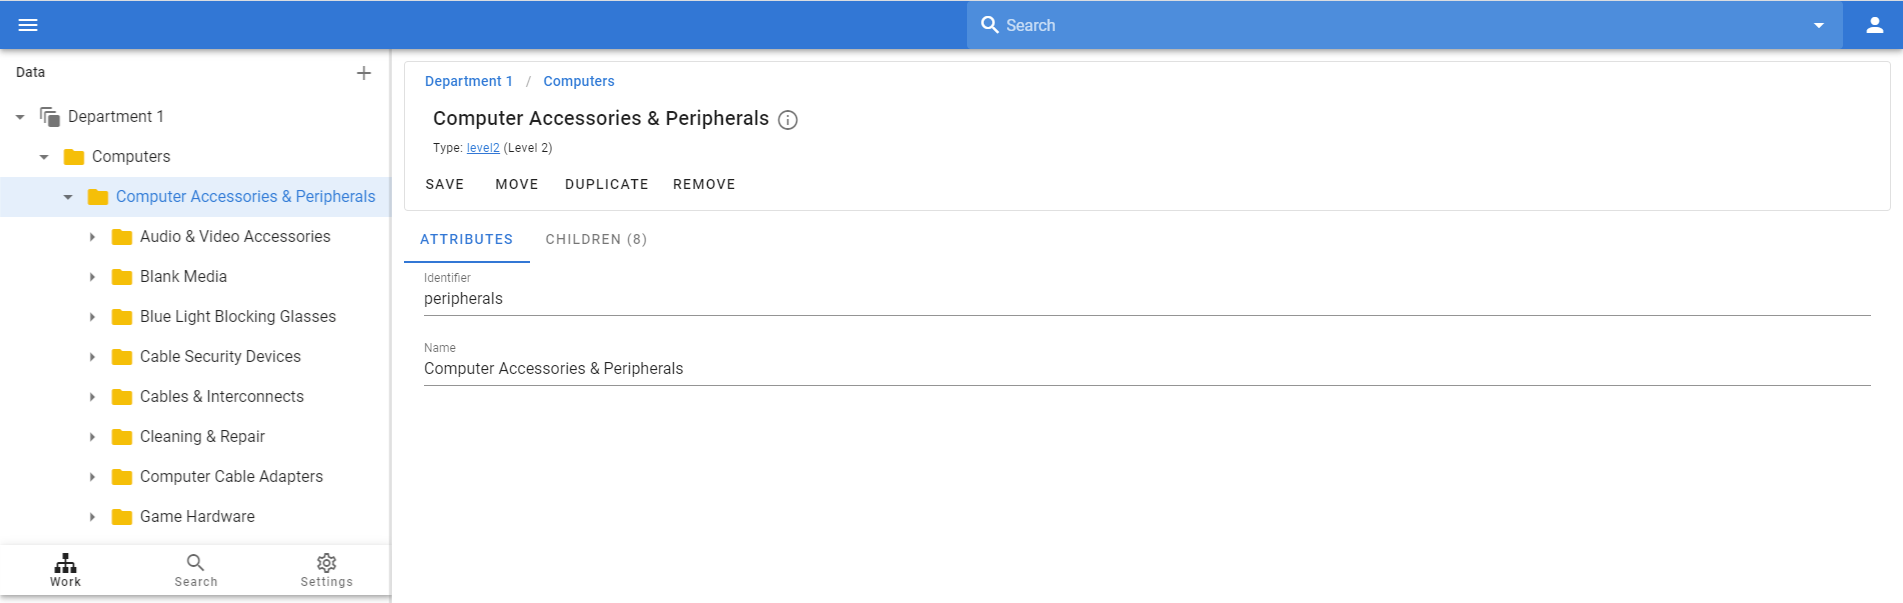
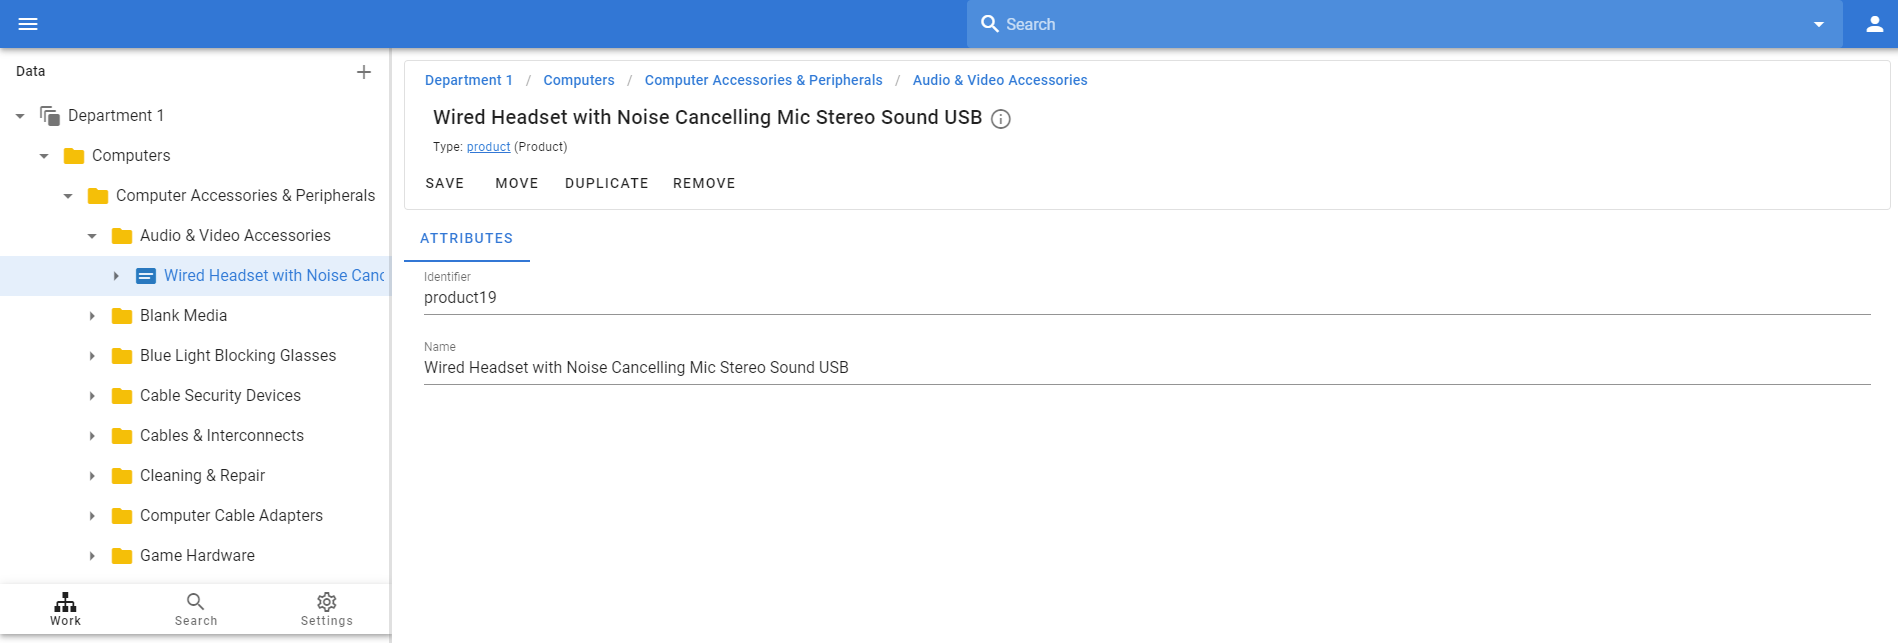
Now you can see how Types are related to real data. You have object Department 1 with the type Department, then object Computers with the type Level 1, then Computer Accessories & Peripherals with the type Level 2 and then set of objects Audio & Video Accessories, Blank Media, etc with the type Level 3:
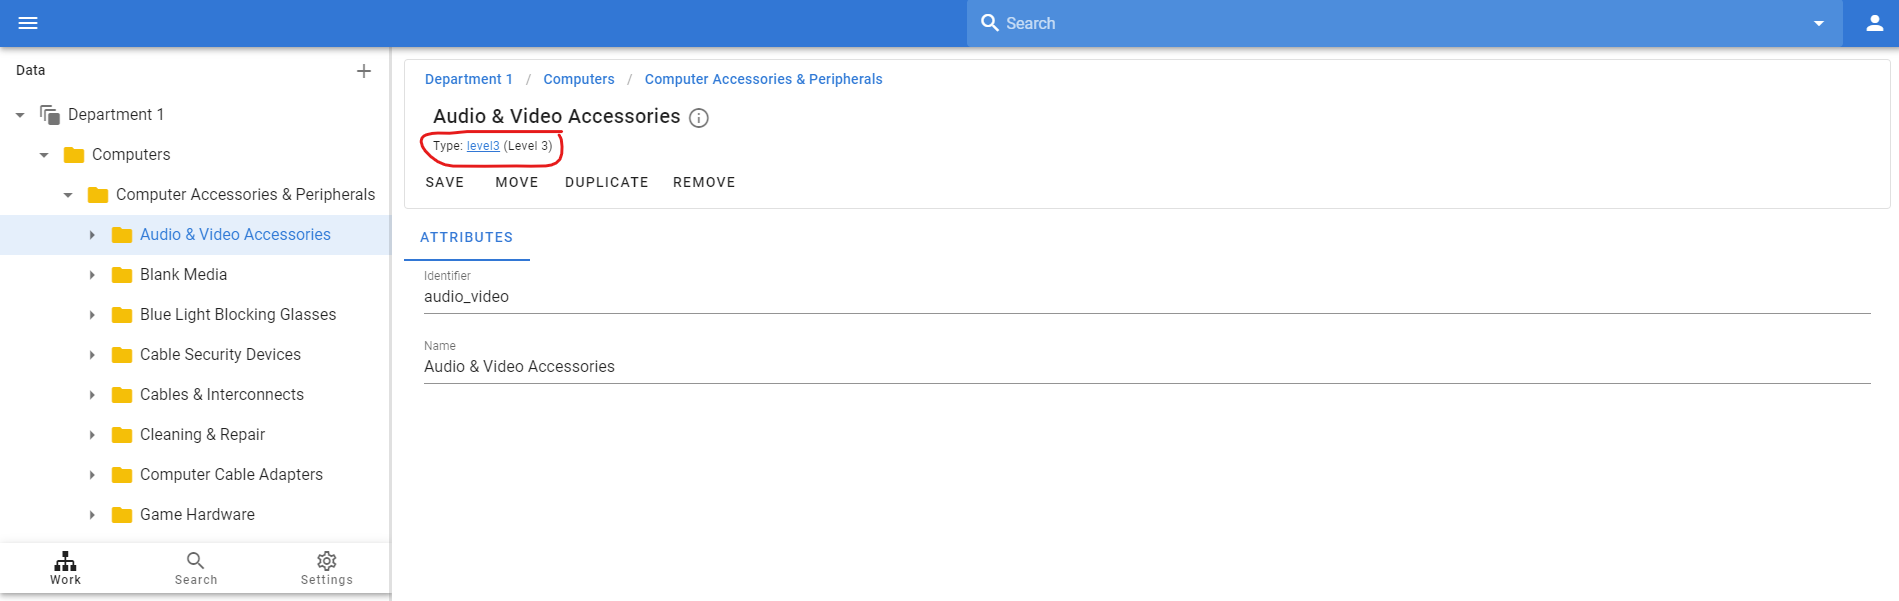
Thus, types define what kind of entities or objects you have in your system and the hierarchy between them. So when you define the data model, you control that the user can only add Level 2 objects under Level 1, etc.
We also can add products now:
But our product has no attributes. You can now go to the Attributes section to learn how to add attributes to your products or other objects.
Dealing with Variants
Variants are products that share many attributes and differ in only a few attributes. For example, a T-shirt. One T-shirt has the same attributes such as manufacturer, brand, material, style, gender, etc., but has different colors and sizes. Each color/size combination has its own SKU and may even have different prices. So the T-shirt is a variant itself, and every color/size combination refers to product under it.

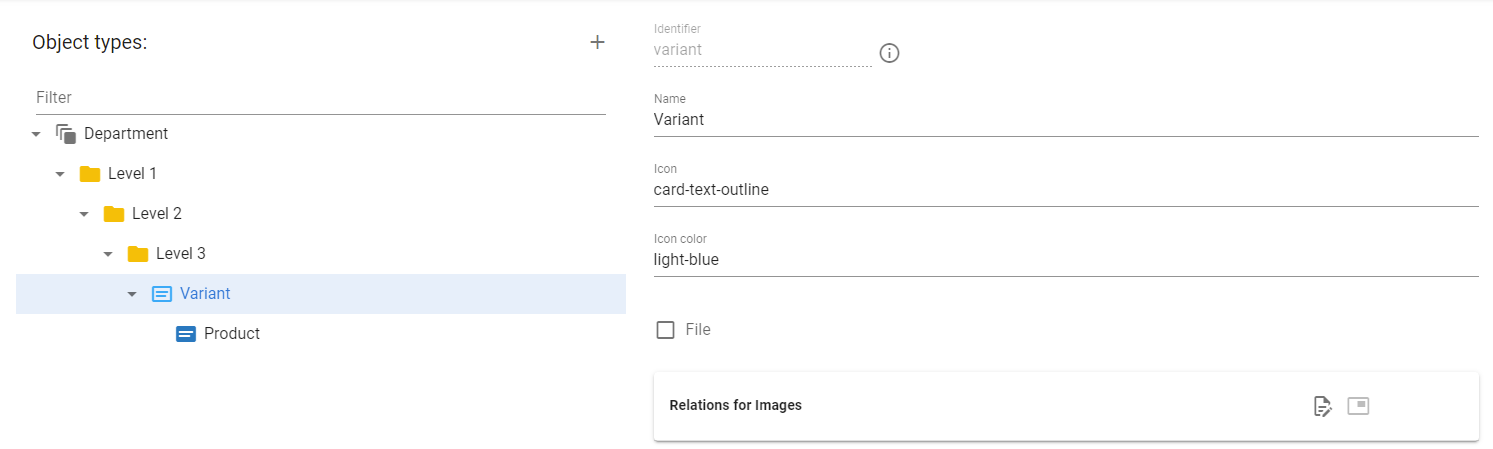
Thus, we can model the Variants in our data model as one more hierarchy between levels and products. Let's remove our current Product type and then add the Variant and Product type again, but below the variant:
We will store all common attributes at the variant level and attributes that differ at the product level. Please refer to the Attributes section to learn how to add attributes.
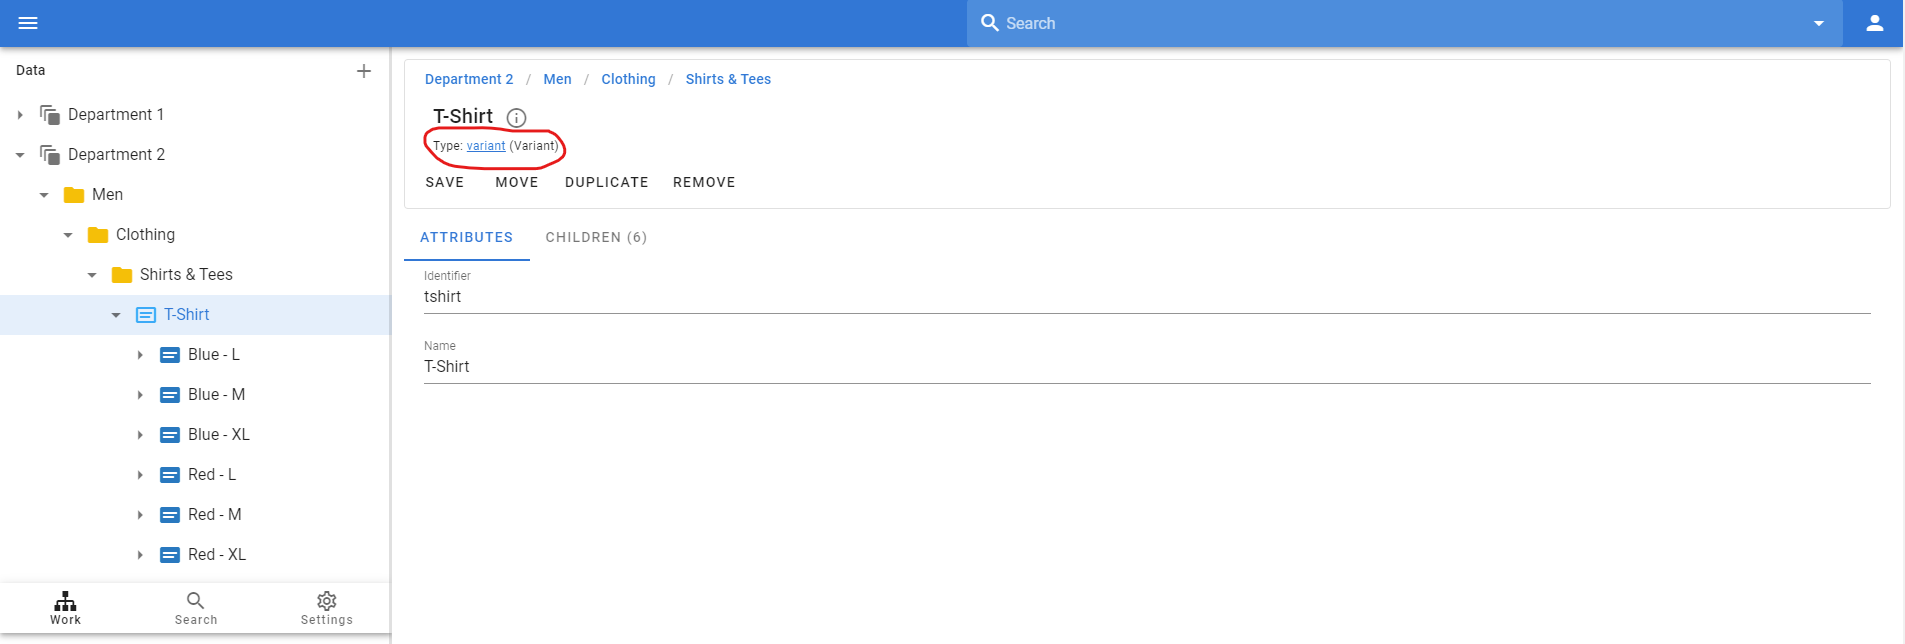
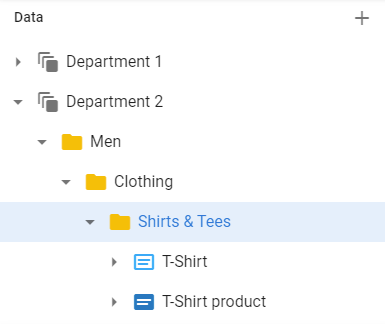
Let's go back to the Work area and fill in the required hierarchy and the product itself as an example of how this data model works.
Having the same type in different places in the data model
We now have the problem that we have only defined the product at the variant level in our data model. But we have no variants in computers. So how do we have a Product under both the Variant level and the Level 3 level?
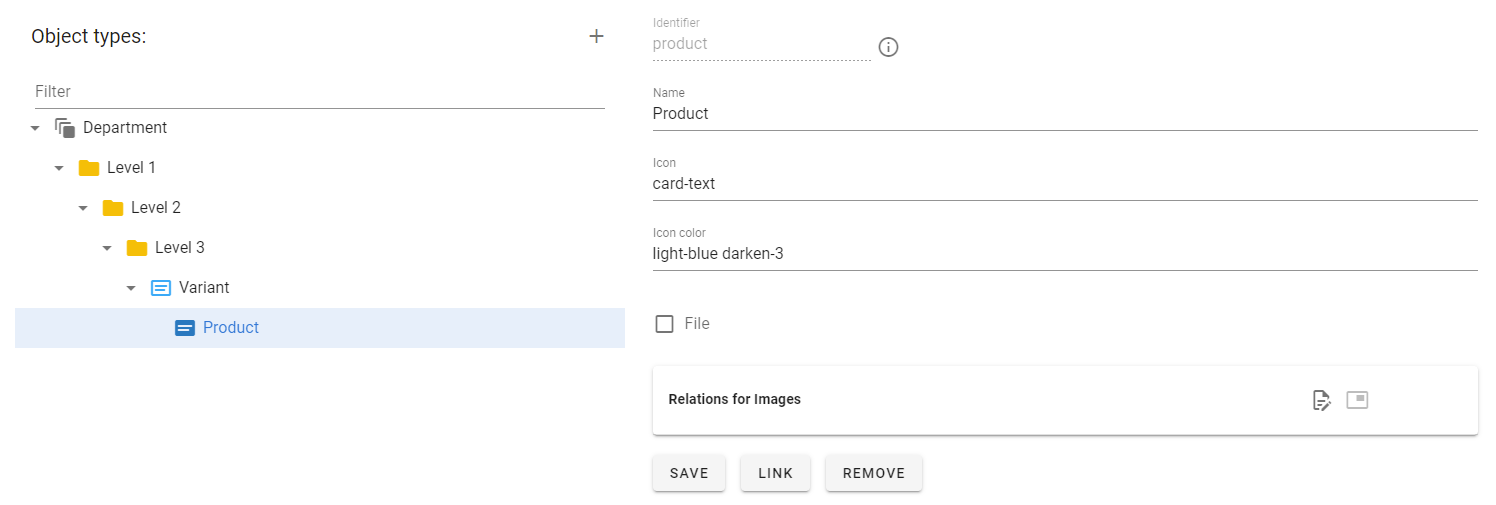
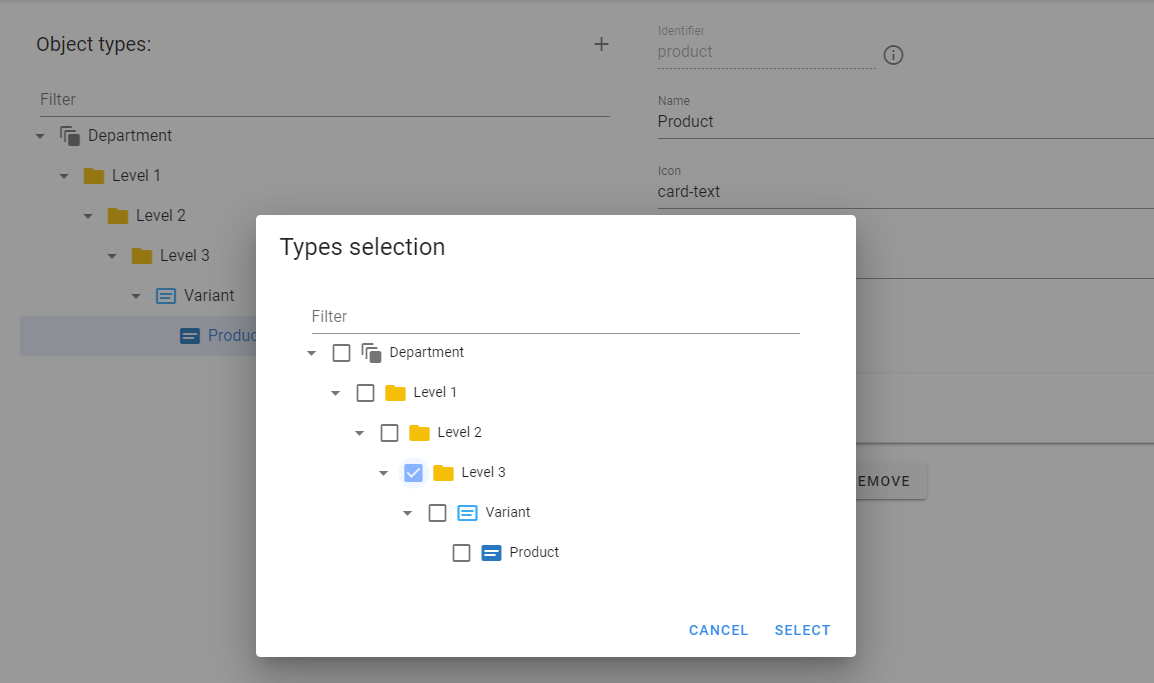
No problem, we can link the Product type to be also at Level 3 level! Let's click on the Link button, select the Level 3 type.
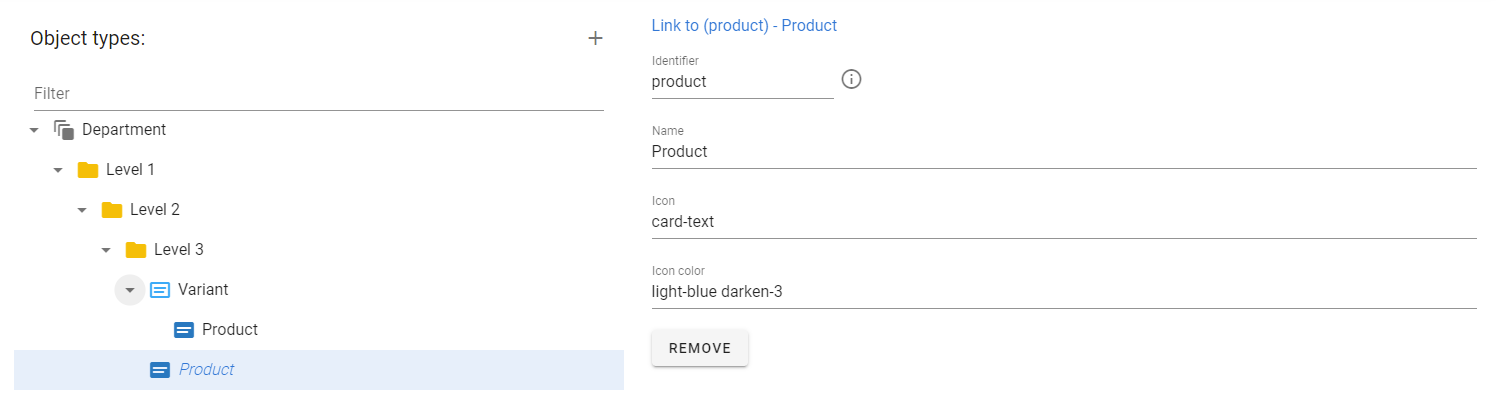
So now we have the Product type and under Variant and under Level 3.
What does this means for our data? This means that we have have the Variant or the Product under Level 3. This is how it is looks like:
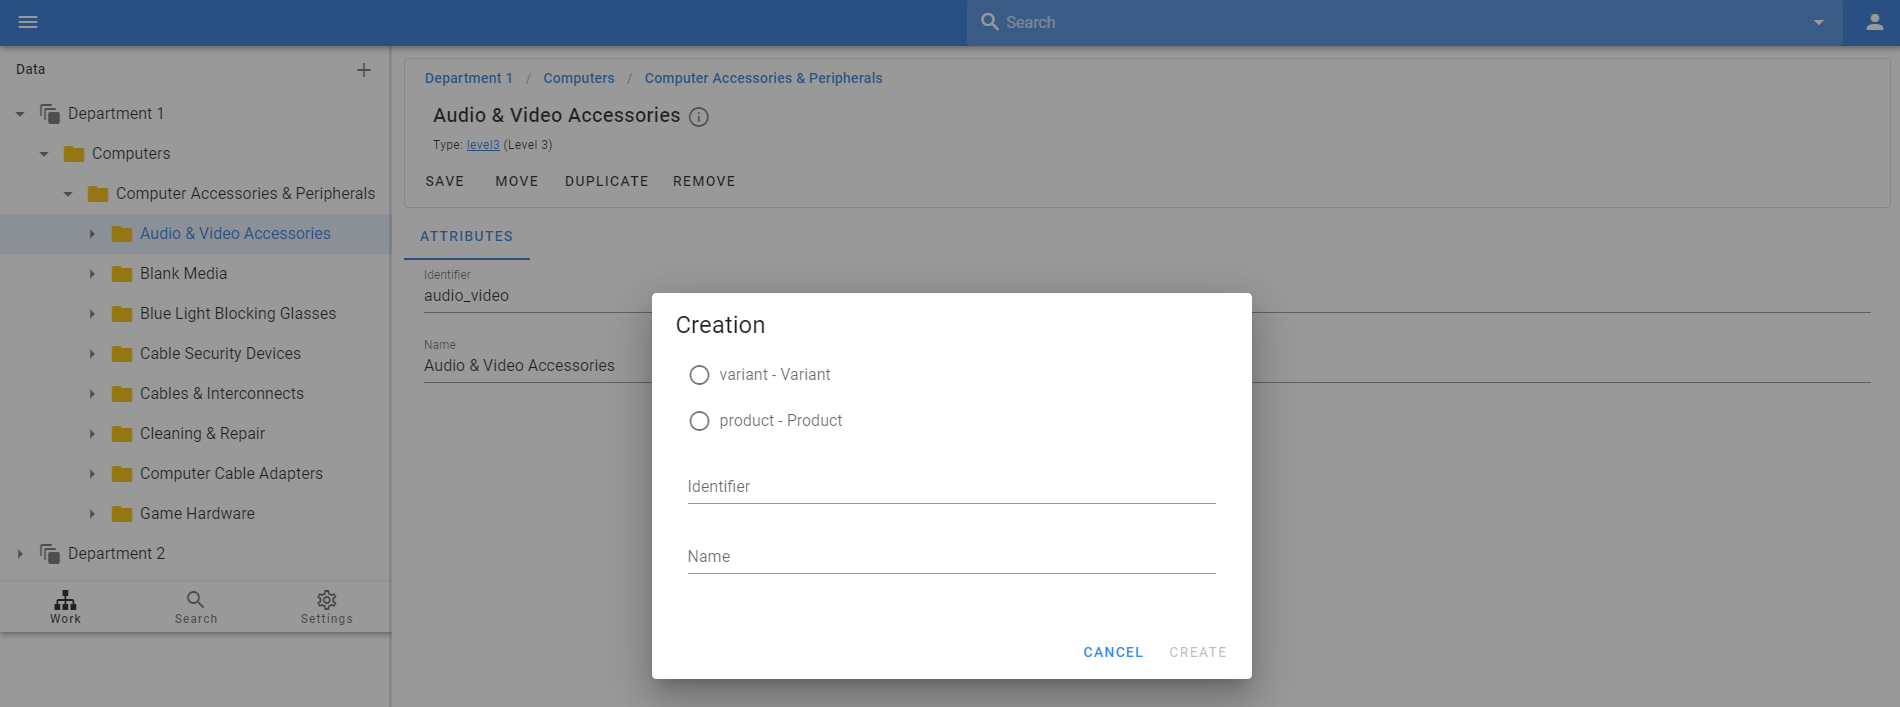
If we select the Variant here, we will be able to add the Product under it, or we can create product only here.
Our data model is now more flexible. Also, products or variants may not only be at Level 3, what if we can have them also at Level 2 or Level 1 of our hierarchy?
It's simple! We can also link them there!
And we will have products or variants at all levels.
Unlimited number of levels in the data model
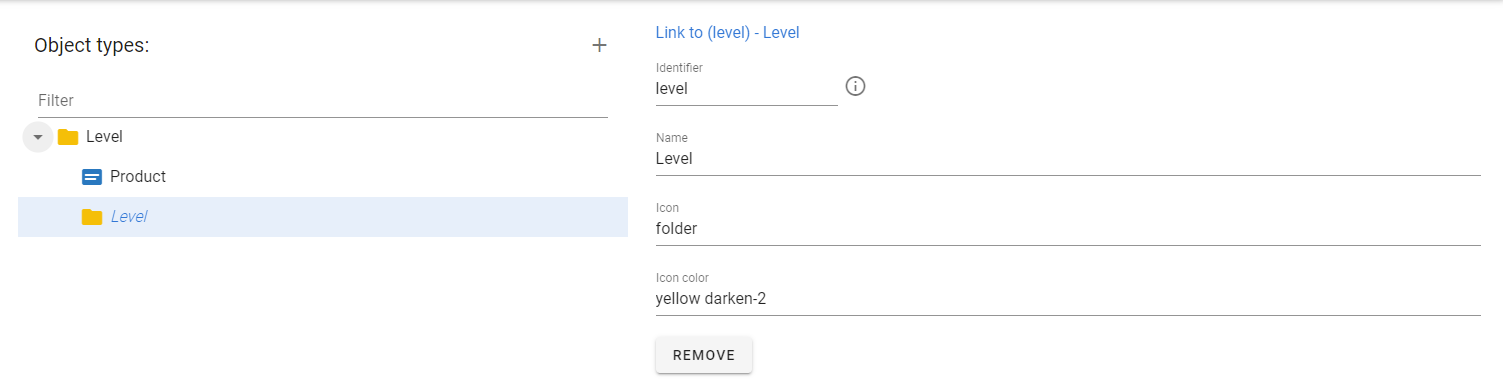
So what if you don't know exactly how many levels you will have? Maybe 3 or more in some categories. Yes, you can define a maximum number of levels or you can also use links. You can define a Level type with the Product below it, and then link Level with itself!
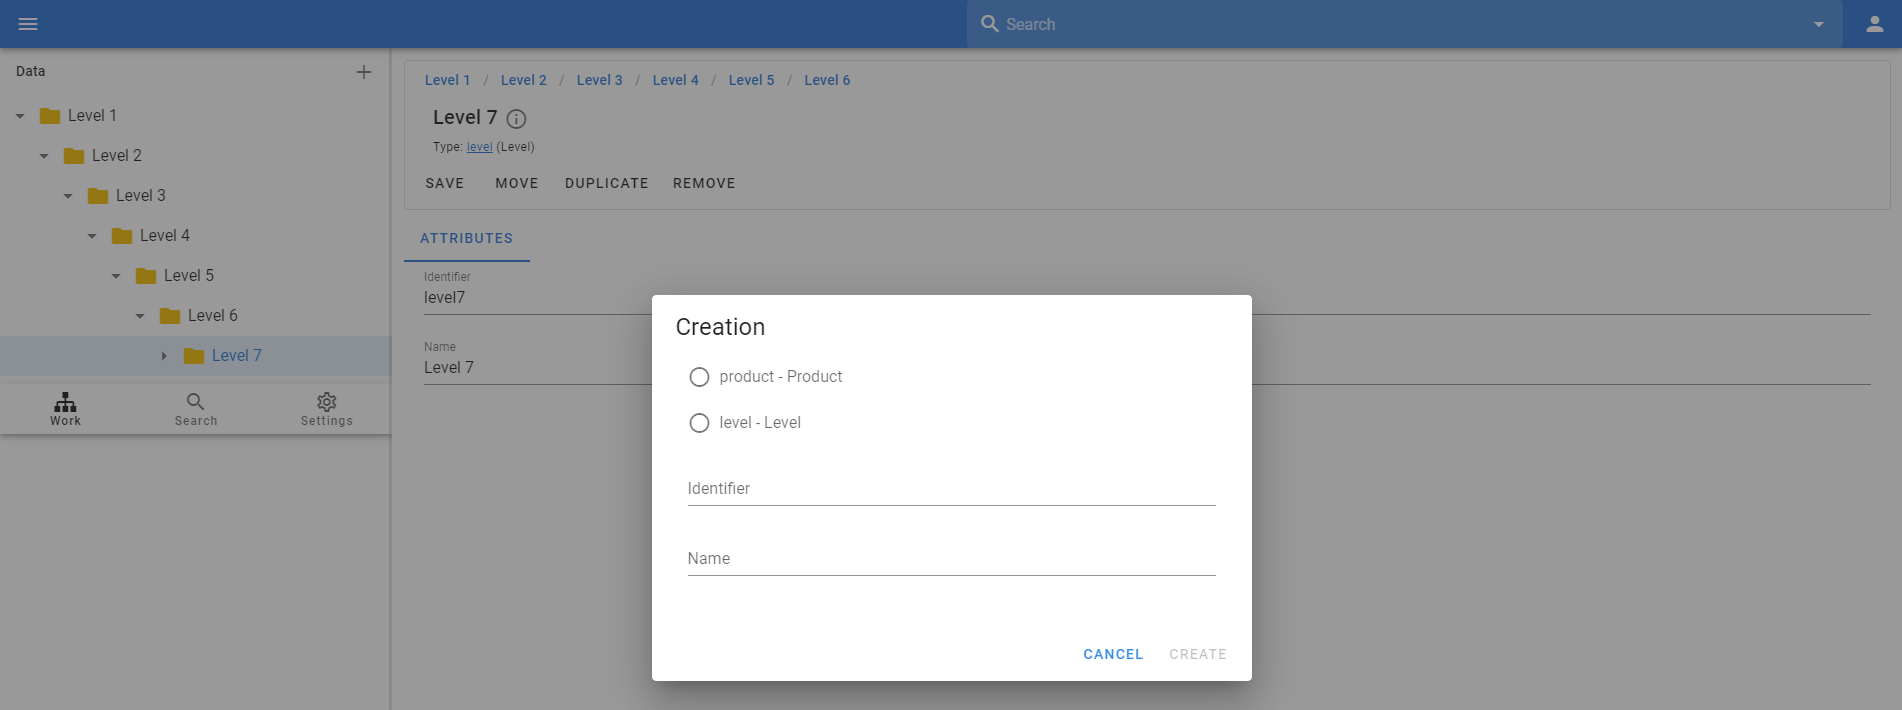
And you will have unlimited levels with the ability to have products at all levels.
Storing assets (images, videos or other files)
Images or files are very important to products. It is very difficult to sell a product online without images. You can also store certificates and any other files as attachments to your products.
You must define special types that will store images, videos, or other files associated with your products.
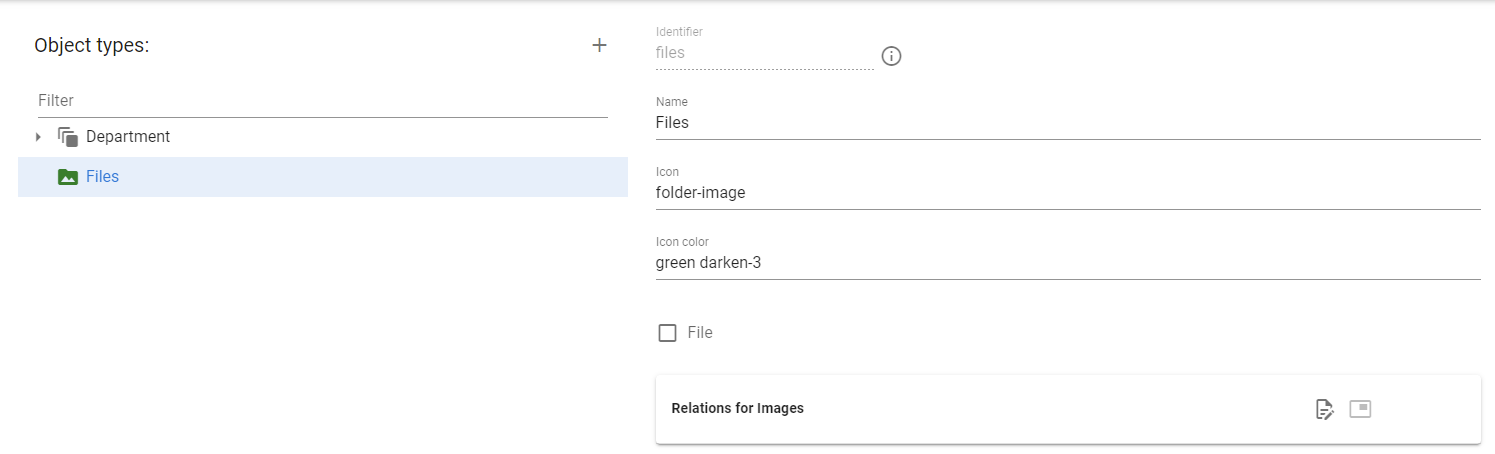
Let's first define a root type where we will store our files:
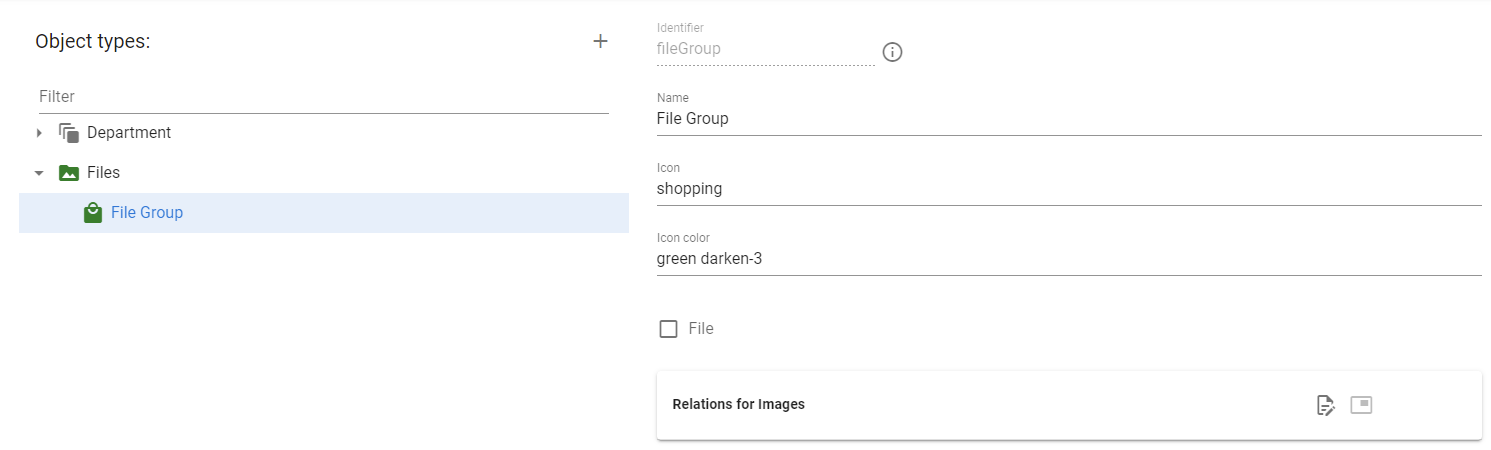
If we have different types of files, it is not good to keep them in one place, so let's add a sibling hierarchy so that we can group our files:
Now let's add images and files. Let them be of different types so that you can distinguish between them.
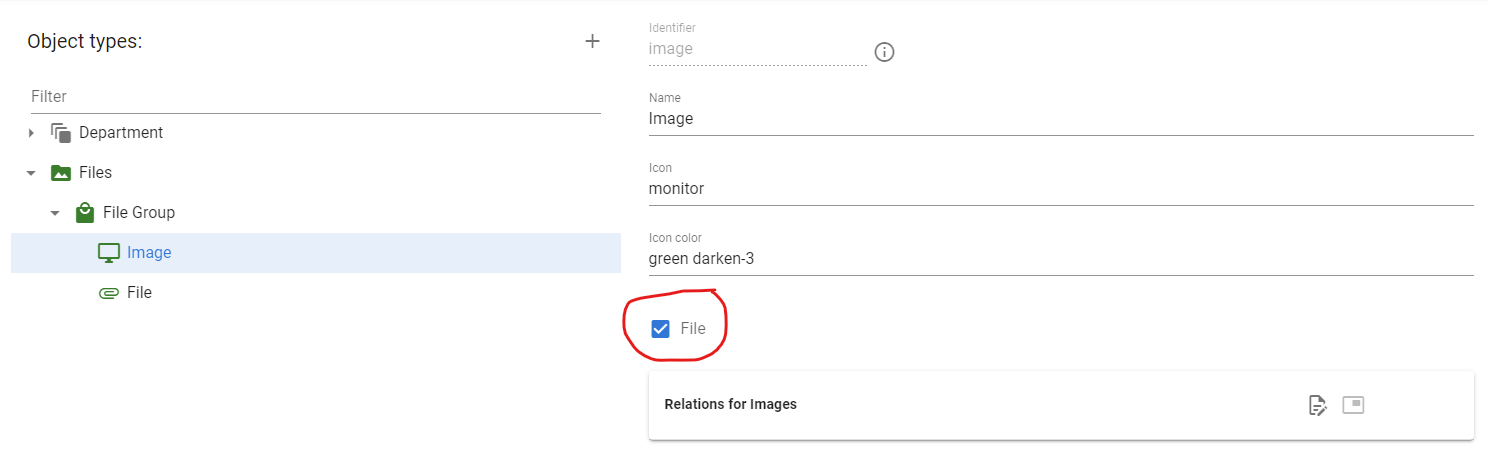
Note please that you must select File option if you want to store files in this object.
After that, you can create the necessary structure and create an example of an image object (without the image itself yet).
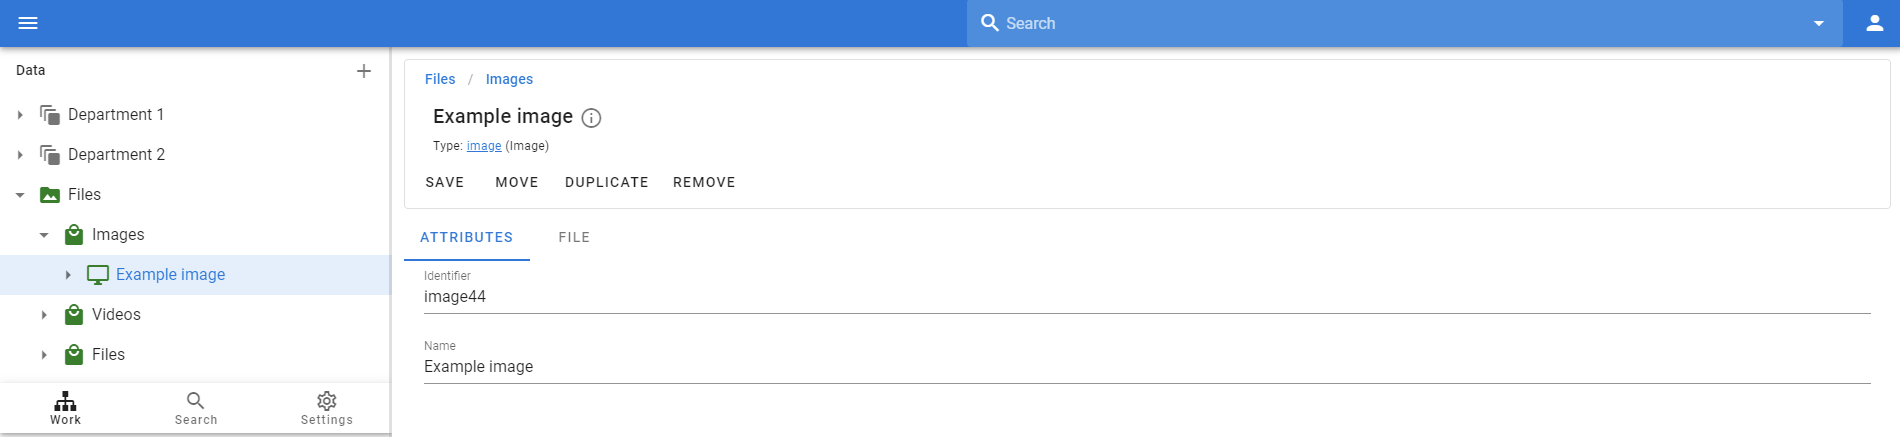
Then you can switch to the File tab and upload an image there.
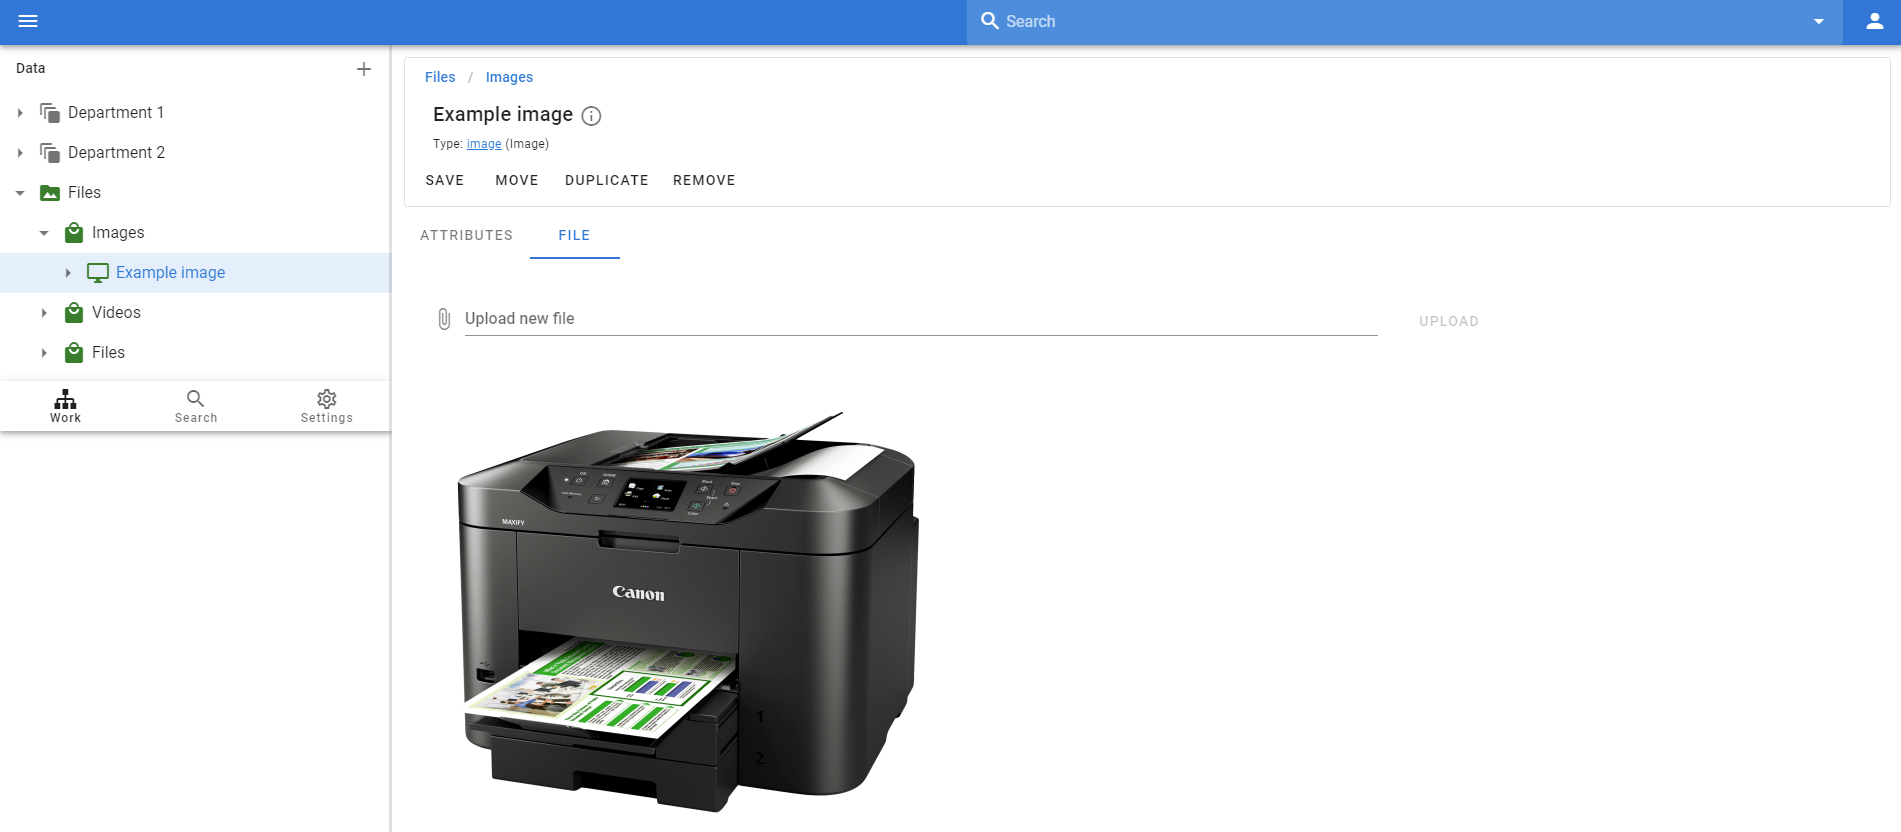
Only the one file can be loaded into the one object. Therefore, if you need to upload multiple files, create multiple corresponding objects.
Later you can associate this file with the corresponding product or any other object (for example, you can assign an image to a category. We have level types for categories in our data model). For details, see the Relations section.
The system provides several automatic attributes for assets, see the "Automatic attributes for images and files" section on the "Attributes" chapter.
Multiple hierarchies
We have created a main hierarchy in our types that starts with Department, then we have 3 levels of structure, and then a variant with a product below it. And we created a real structure filled with data in the Work area based at this types hierarchy.
This main structure is very important, we will build our attributes on it, because different types of products have a different set of attributes (for example, attributes for a mobile phone are very different from pizza, but both could be our products). Moreover our structure must be based on product type, this means that we can have product only in one place in our structure. We should always have such a main hierarchy in the system so that we can load our product into the correct category and assign the correct attributes.
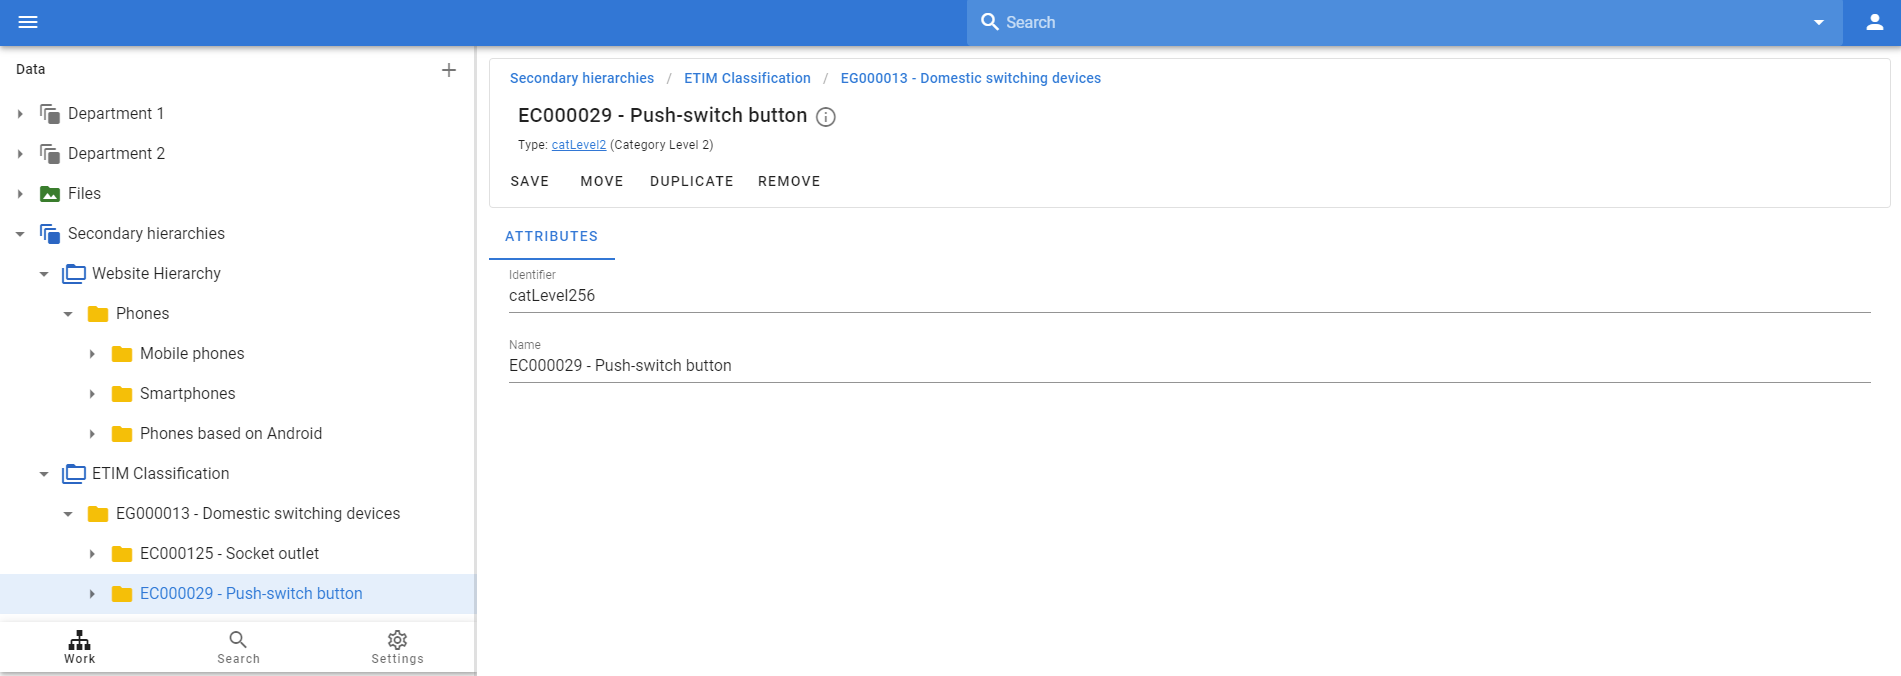
But in real life, there are often many other hierarchies. For example, we might have a website with our products. This website hierarchy may be very similar to the main one, but in any case, we will have differences, because the same product in the web hierarchy can usually be in several categories. Mobile phone will be in Mobile phones category, also it can be in New items category or we can have products by brands for example there.
Another example is some industry standards, for example, there is a classification ETIMopen in new window for electrical products, and you can have both the main (your own) hierarchy and ETIM in the system.
Another example is supplier hierarchies that can be useful for retailers. This way, the retailer will have their own hierarchy with a set of products, but they will also load all hierarchies from all suppliers. Etc.
You can easy define other hierarchies with our type system.
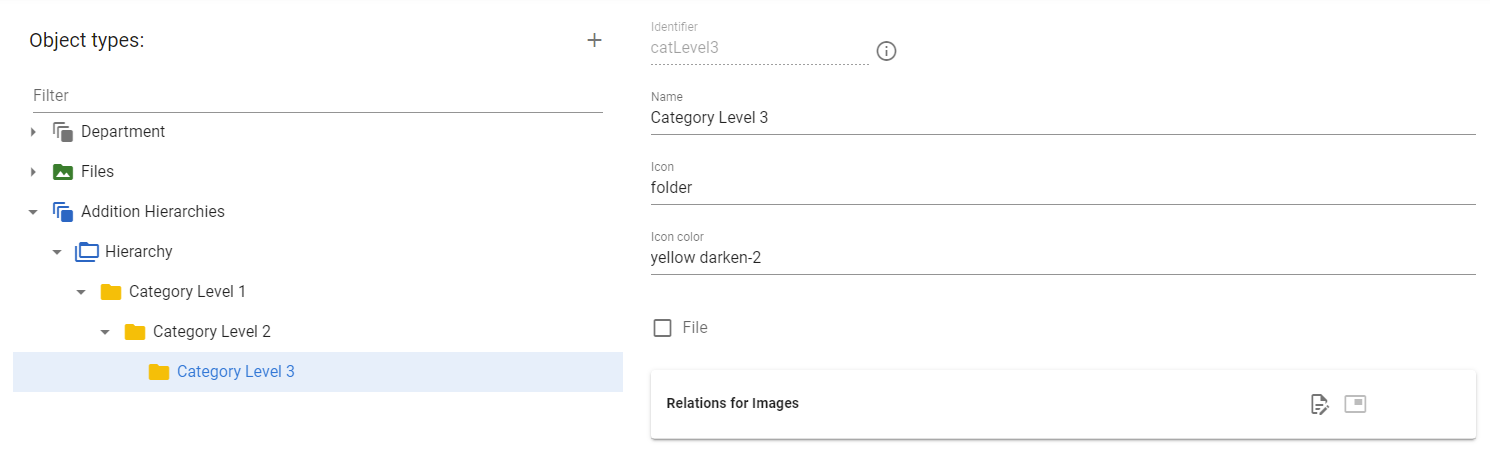
Let's create a new root type to hold all additional hierarchies and then a hierarchy type to hold a specific hierarchy.

And now we will create 3 levels of categories under the hierarchy node. These will be levels (categories) different from the levels of our main hierarchy.
So now we can go to the Work area and fill in the data for our additional categories.
You can later link your products to these additional hierarchies using relations, see section "Linking products to additional hierarchies" on the "Relations" chapter.
Order of items in the object tree
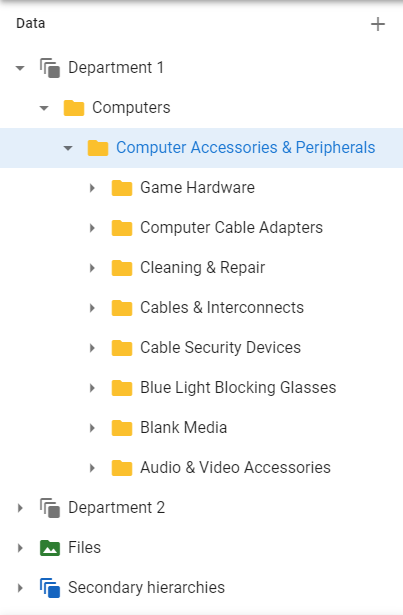
We have the following object tree now:
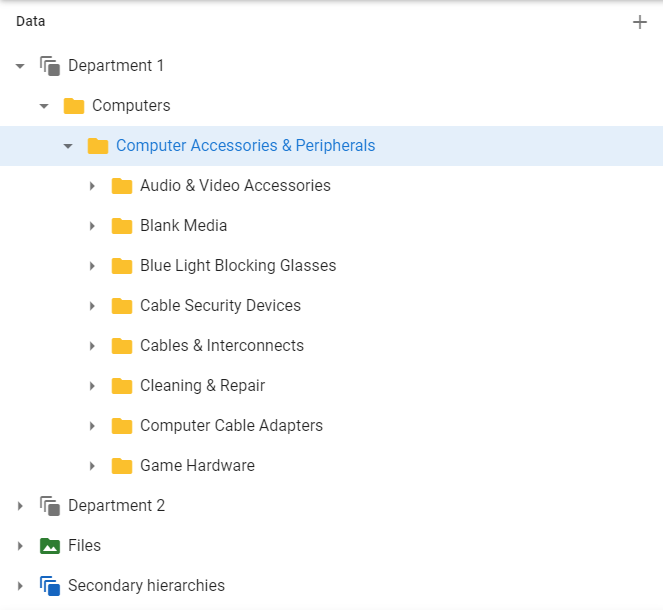
As we can see, children in the Computer accessories and peripherals section are arranged in ascending order. But what if we need them to be in descending order? We have the ability to define how children can se sorted.
Computer accessories and peripherals has type Level 2 in our data model. Let's go into the Level 2 type and define new order:
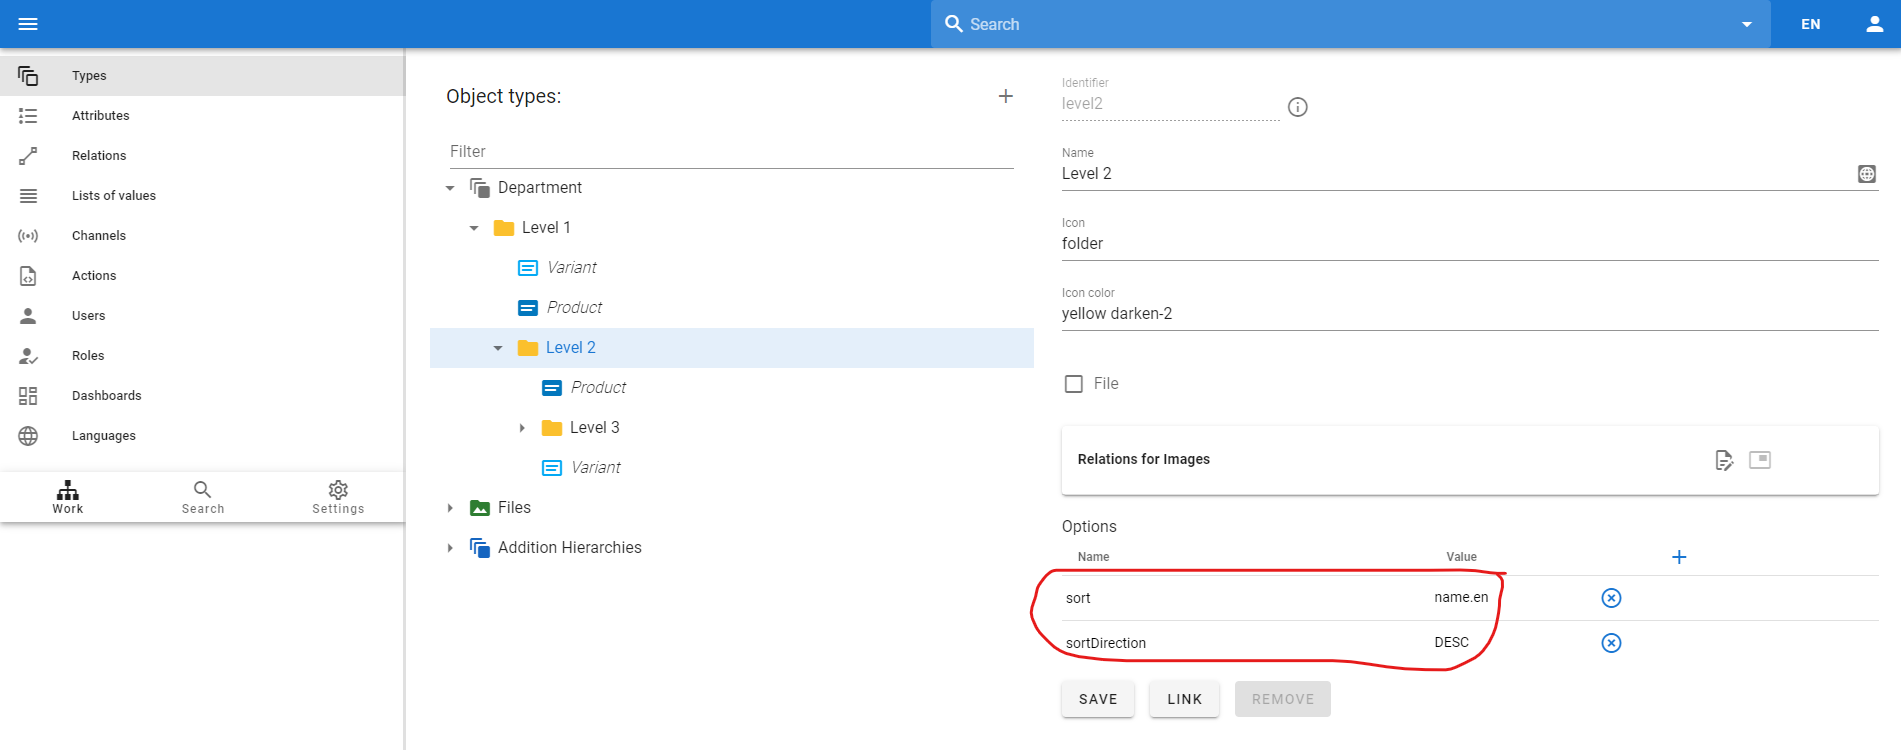
This means that all children for all Level 2 nodes will be sorted by their English name in descending order.
The sort option is the field that is used for sorting and sortDirection can be: ASC and DESC. So this means that we can make sorting also by some attribute. For example, we can define an attribute with the identifier order for our child objects, and then we can use the expression values.order in the configuration of the parent type to sort children by this attribute. Thus, we can define any order we need.