Attributes
Introduction
We learned how to create different objects in the Types section. Now let's assign different attributes to them so that we can store data in our objects.
You can create attributes for any object in OpenPIM, not just products. This way, you can create attributes for hierarchies, images, files, additional categories, etc.
Attribute Groups
All attributes are grouped into attribute groups, so you must first create an Attribute Group. Let's go to Settings -> Attributes and create new attribute group.

We have the following options there (in addition to Identifier and Name):
Order- this is the number that the system will use to order the groups in the object view, so if you want a group to be at the top, set it to order 1.Visible- uncheck this if you want this group to be hidden in the user interface.
Common options for all attributes
Now when we have a group, let's create an attribute:
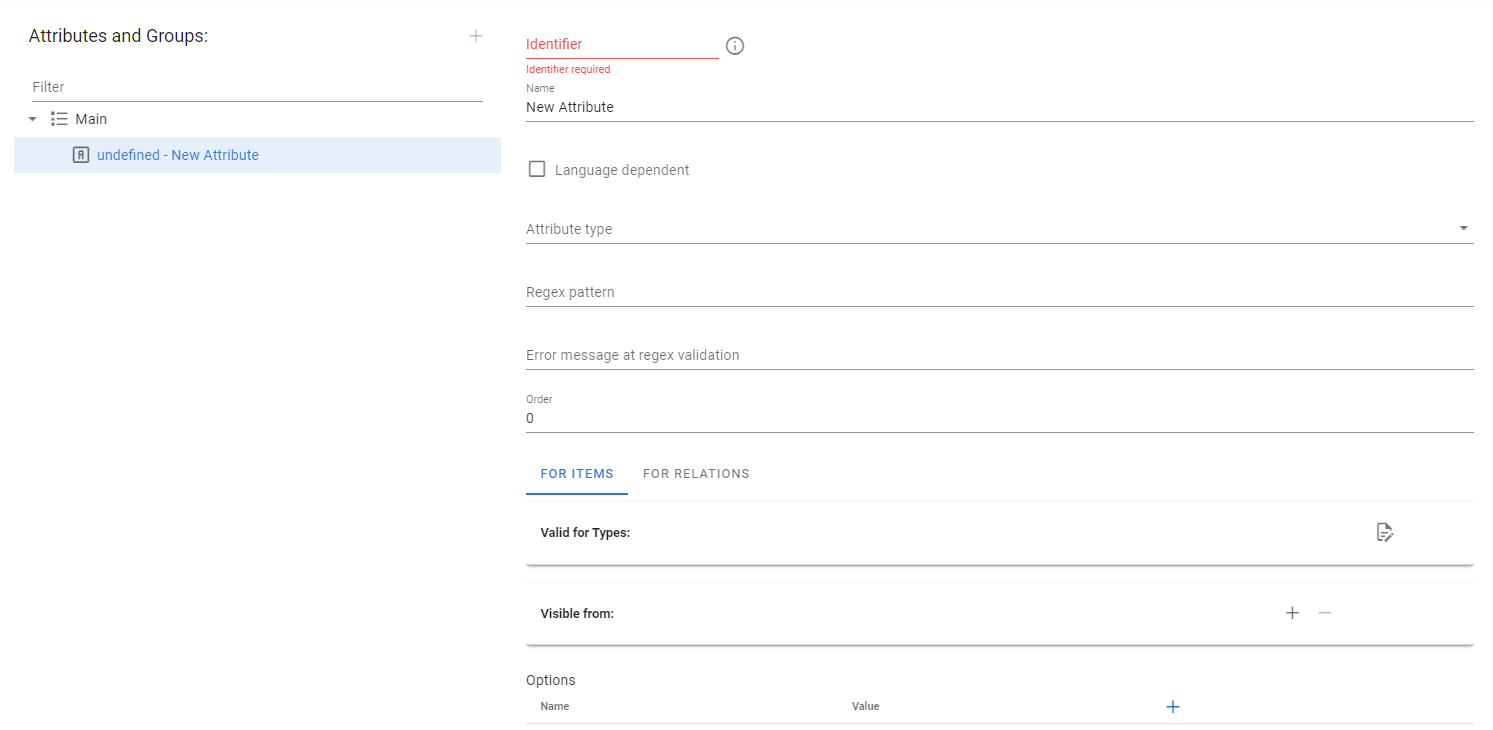
We have the following options:
Identifier- is the text by which you can refer to this attribute in the future, it must be in English and must not contain spaces.Name- attribute name.- The
Attribute typeis the type of data that you can store in this attribute. The following data types are available: Text, Boolean, Integer, Float, Date, Time, URL and List of Values Order- it determines in which order the attribute will be displayed in relation to the other attributes in that group
Text attributes
Let's create a Text attribute. It will look like this in Work area when you open your object.

You can also check the Multi line option in the attribute setting. This way your attribute will be able to store multiple lines.

Or you can select the Rich text option to store rich content.
You will be able to store all possible rich content, tables, images and all possible markup and formatting.
Languages and Language Dependent attributes
Imagine that you have a description of your products, and this description can be in English or German. You can create 2 different attributes, one for storing the description in English and the other for German, but this is inconvenient.
Better to set the option Language dependent. This means that you will have one attribute, but it will store different values for each language on the system.
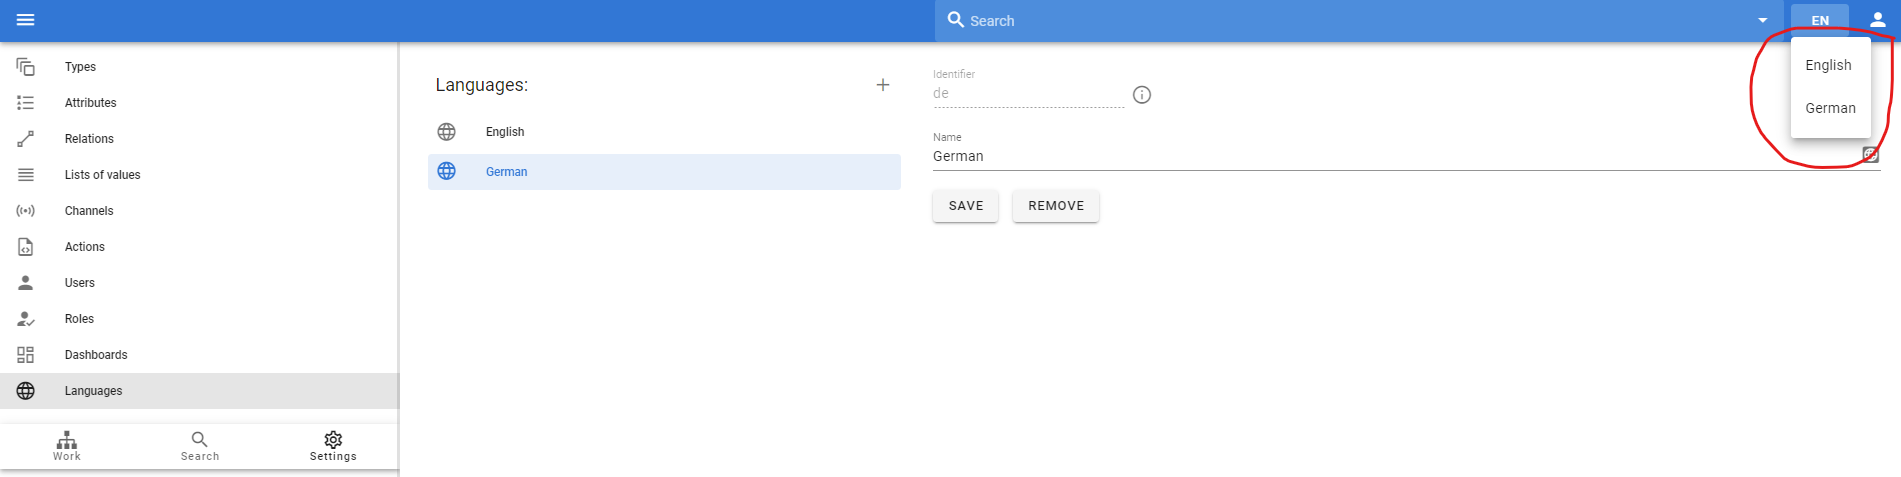
Let's go to Language area and add one more language to our system:

You will see that you now have the option to switch languages in the toolbar:
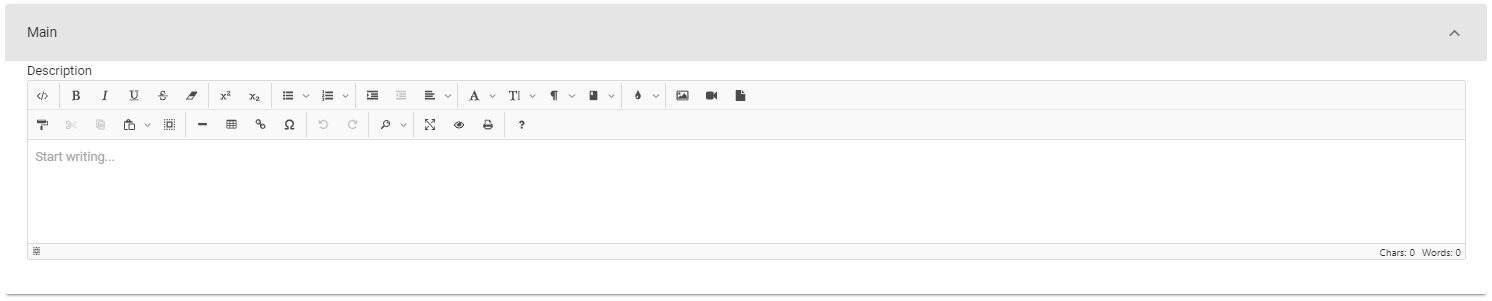
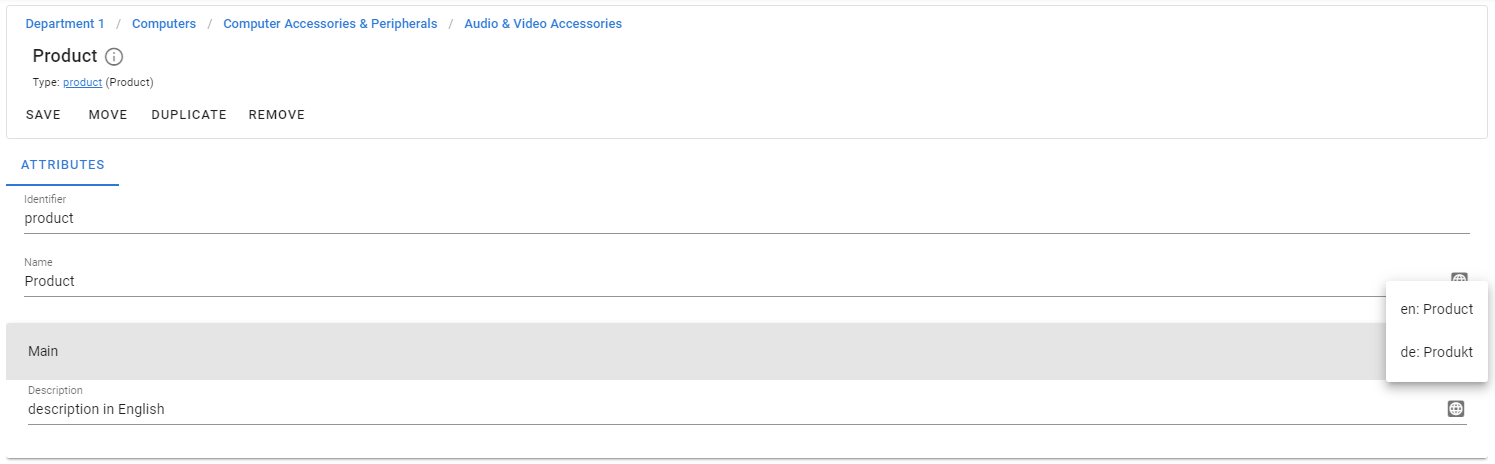
Let's go back to our Description attribute and make it language dependent, so now the attribute will look like:

We can now switch to German and add German values as well.

Note that the object name is also automatically language dependent. We also have a button  that allows us to see values for all languages at the same time:
ASSIGNING AN ATTRIBUTE TO AN OBJECT
TIP
This is a very important topic of attribute management, which is why we highlighted it.
Imagine that you need to create a description attribute and it will be visible for all products. Therefore, all you have to do is assign the Description attribute to the Product object only. But usually we have a lot of attributes that are only valid for a certain category. For example, products in Audio and Video Accessories may have the attribute Connector Type, and this attribute should only be for products in this category, all other categories should not have this attribute.
So to assign attribute to object we must set 2 options:
Valid for Types. First, you must determine what type this attribute will be assigned to. In our case, both attributes will be assigned to theProducttype.

You can click on the button to select the required types. You can choose several types.
Visible from
Secondly, you must select the level (category) from which this configuration will be applied.
We want our description to be visible across all products, so let's pick the highest available category. We have top categories Department 1 and Department 2 in which we have products.
This is our main hierarchy:

This is what we have in the attribute configuration:
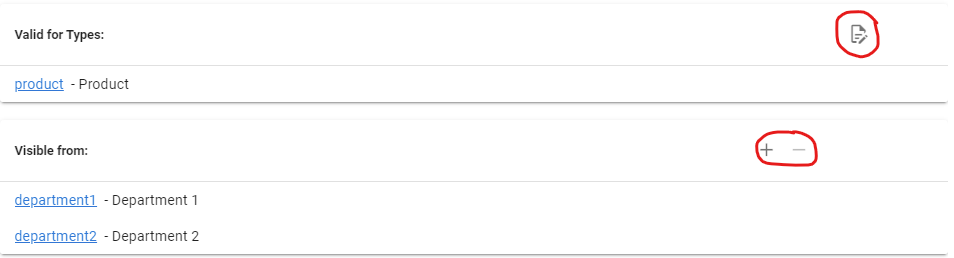
This means that this attribute will be available for all products in the Department 1 or Department 2 categories, including all subcategories.
And we have to select Audio and Video Accessories category for Connector Type attribute.
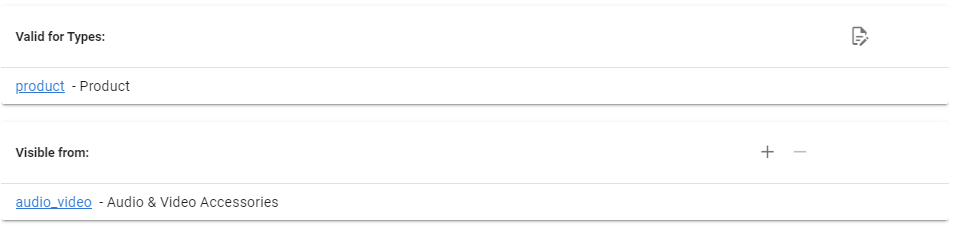
So this means that only products from the Audio and Video Accessories category will have this attribute.
Boolean attributes
Boolean attributes will look like:

Integer and Float attributes
The Integer and Float attributes will look like:

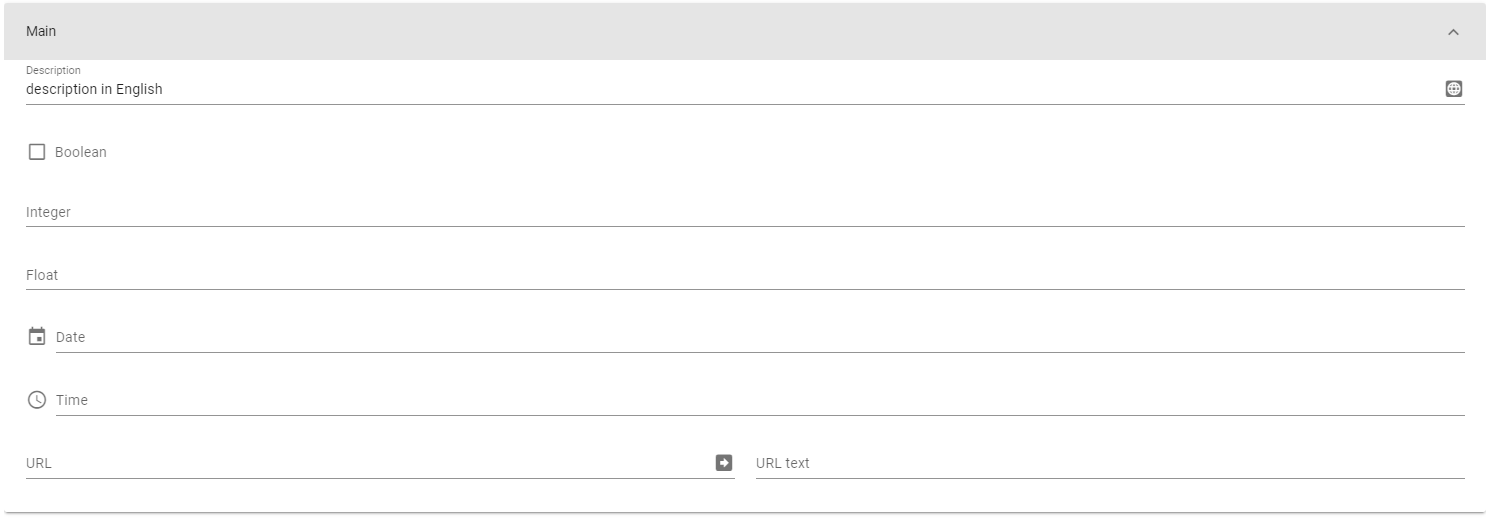
Date and Time attributes
The Date and Time attributes will look like:

URL attributes
URL Time attributes will look like:

You have the option to define both the URL itself and the text on that URL.
List of Values
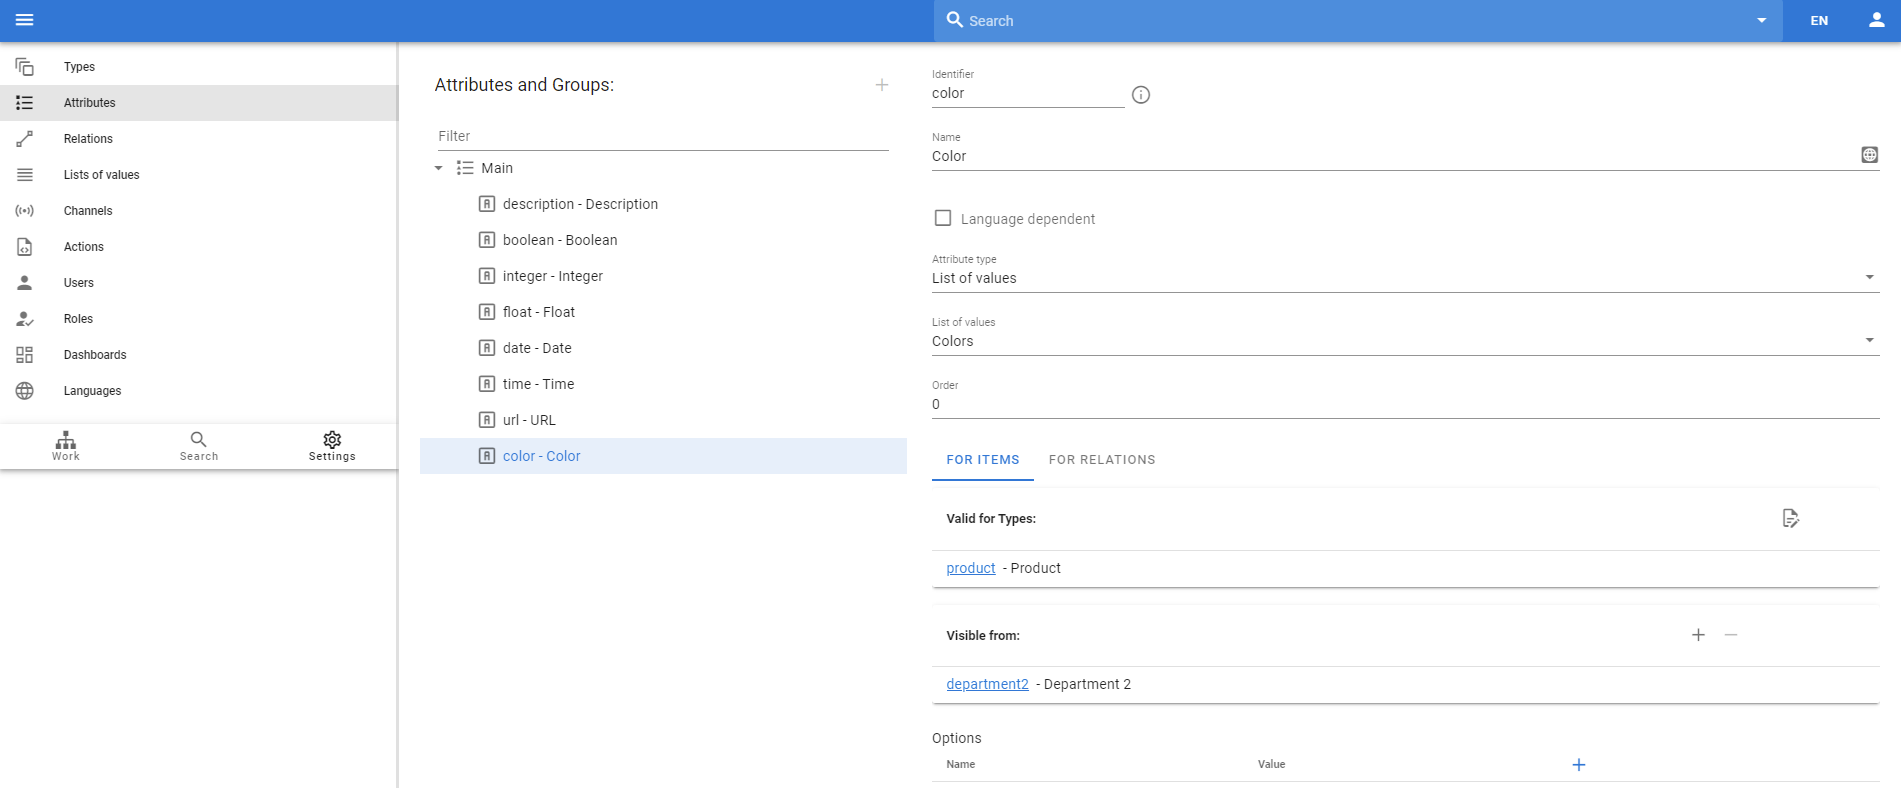
The List of values attributes will look like:

This is a predefined list of options to choose from.
First, we need to define the List of values itself:

And then we can define an attribute based on this list:
Display values only in specified categories
Imagine we have shoes for men and women. Men's shoes usually have fewer colors than women's shoes. How can we configure this?
We can create 2 different List of values with different set of colors and assign 2 different attributes to them. But this is inconvenient.
We have the ability to customize from which category each value will be displayed. Open List of values and click on  button and you will have ability to select categories.

Therefore, we will select Men Shoes for the colors Black and Brown, for example, and we will not see colors like Pink in the Men ́Shoes category.
Dependant list of values
What if we need to store the car model in our system? We want to keep the manufacturer separate from the car model and use a list of values for that. Let's configure 2 list of values.
Car manufacturers:

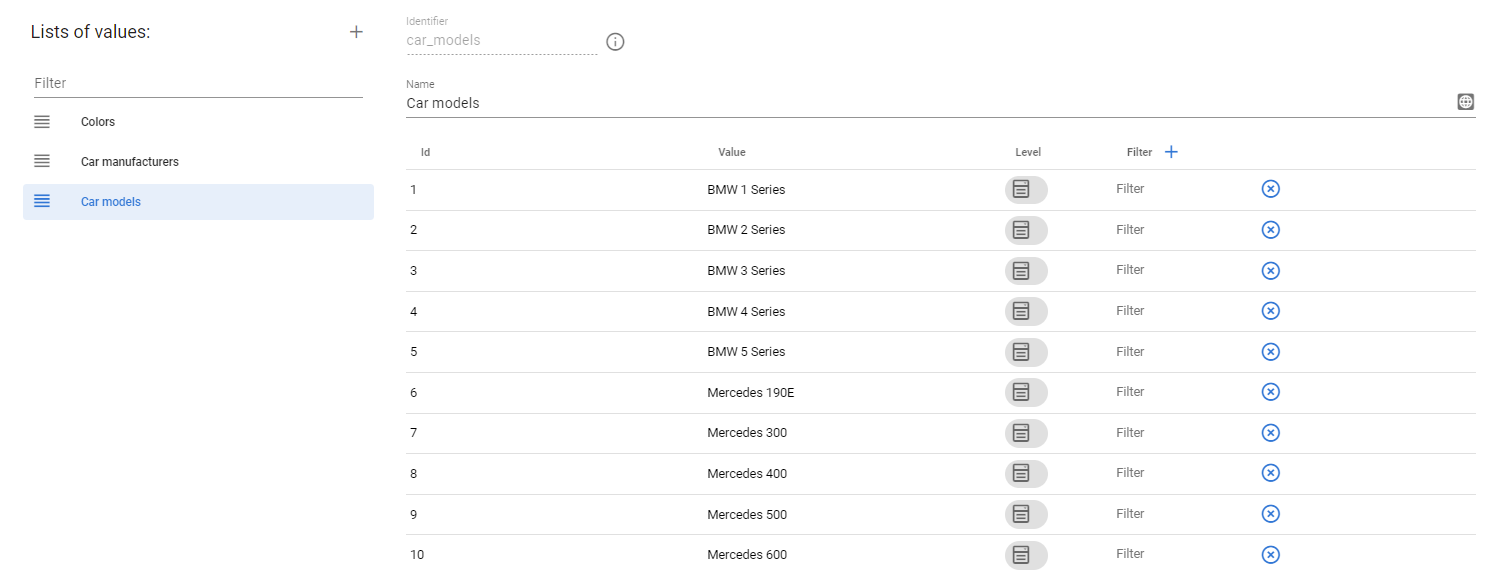
Car models:
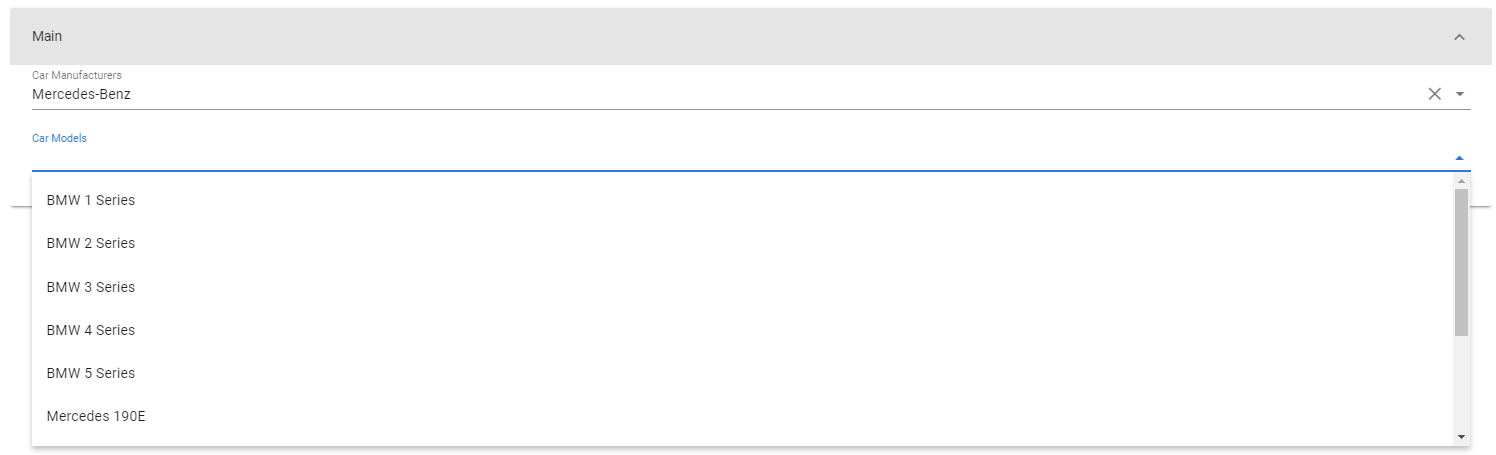
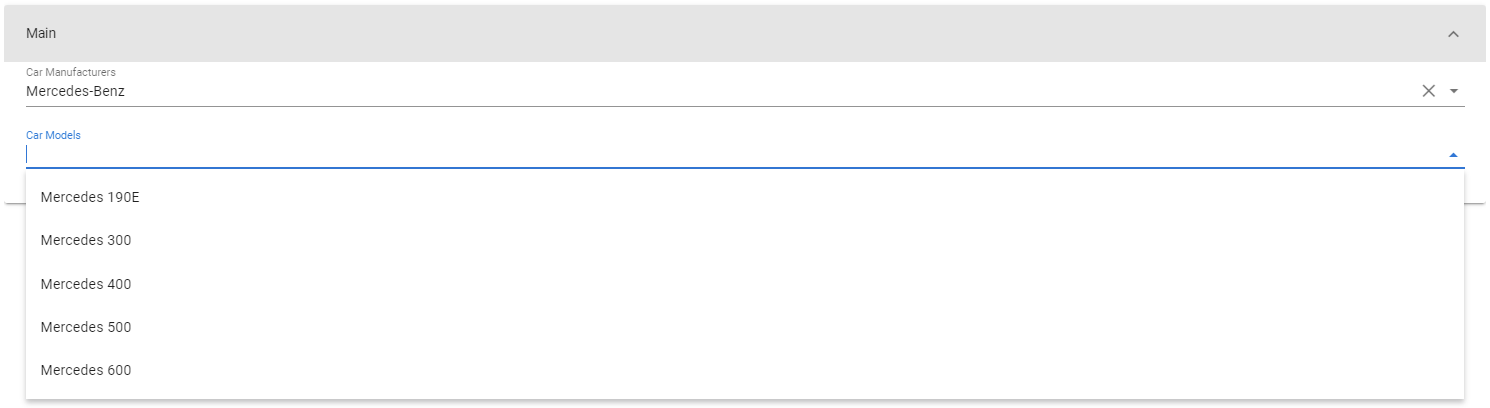
Then, when we create 2 corresponding attributes, our data view will have the following situation: we have selected Mercedes-Benz, but we also see models from BMW. It is very uncomfortable.
We can make a special configuration to see only the corresponding models.
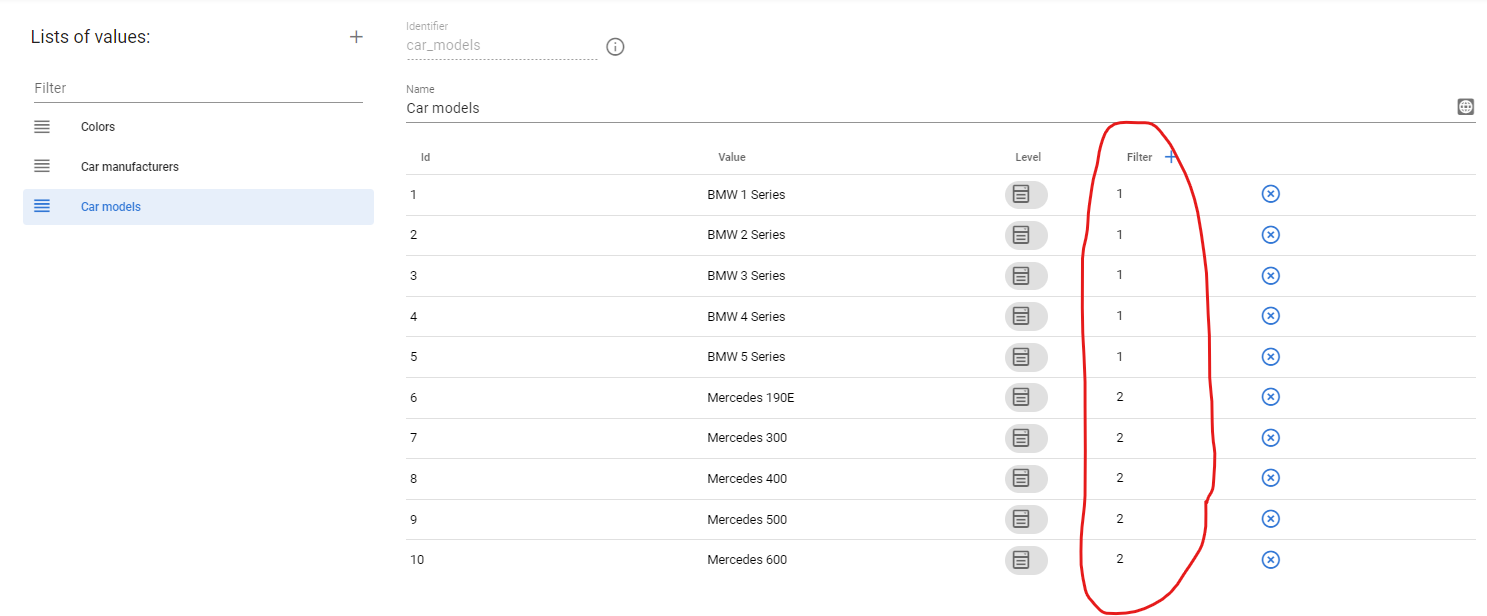
We saw that BMW has an ID of 1 and Mercedes-Benz has an ID of 2 in our Car manufacturers list of value. Let's go now to Car models list of value and define this as a filter.
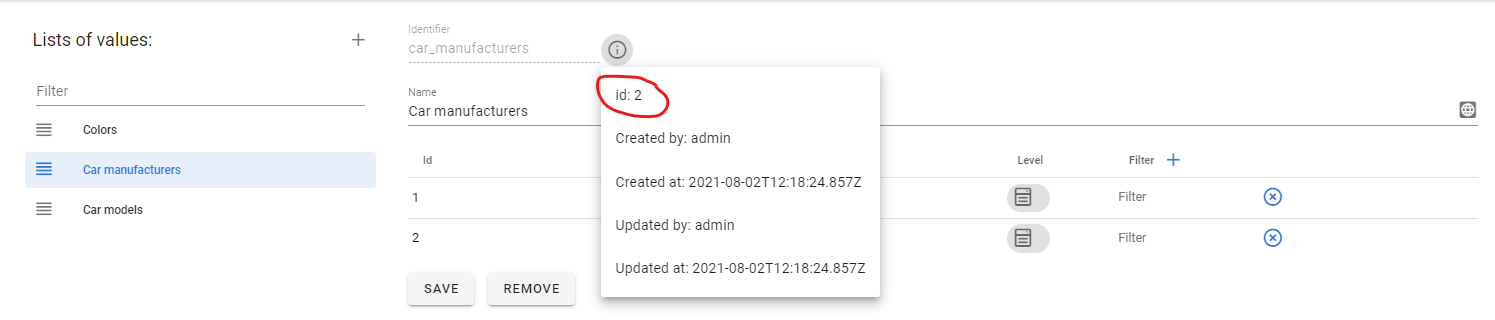
Then we need to go to Car manufacturers list of values and take it ID (we have it as 2 in our example):
And then last one, we should go to Car models attribute (not list of values) and define special option - lovFilter=2 where 2 is the ID of Car manufacturers list of values.
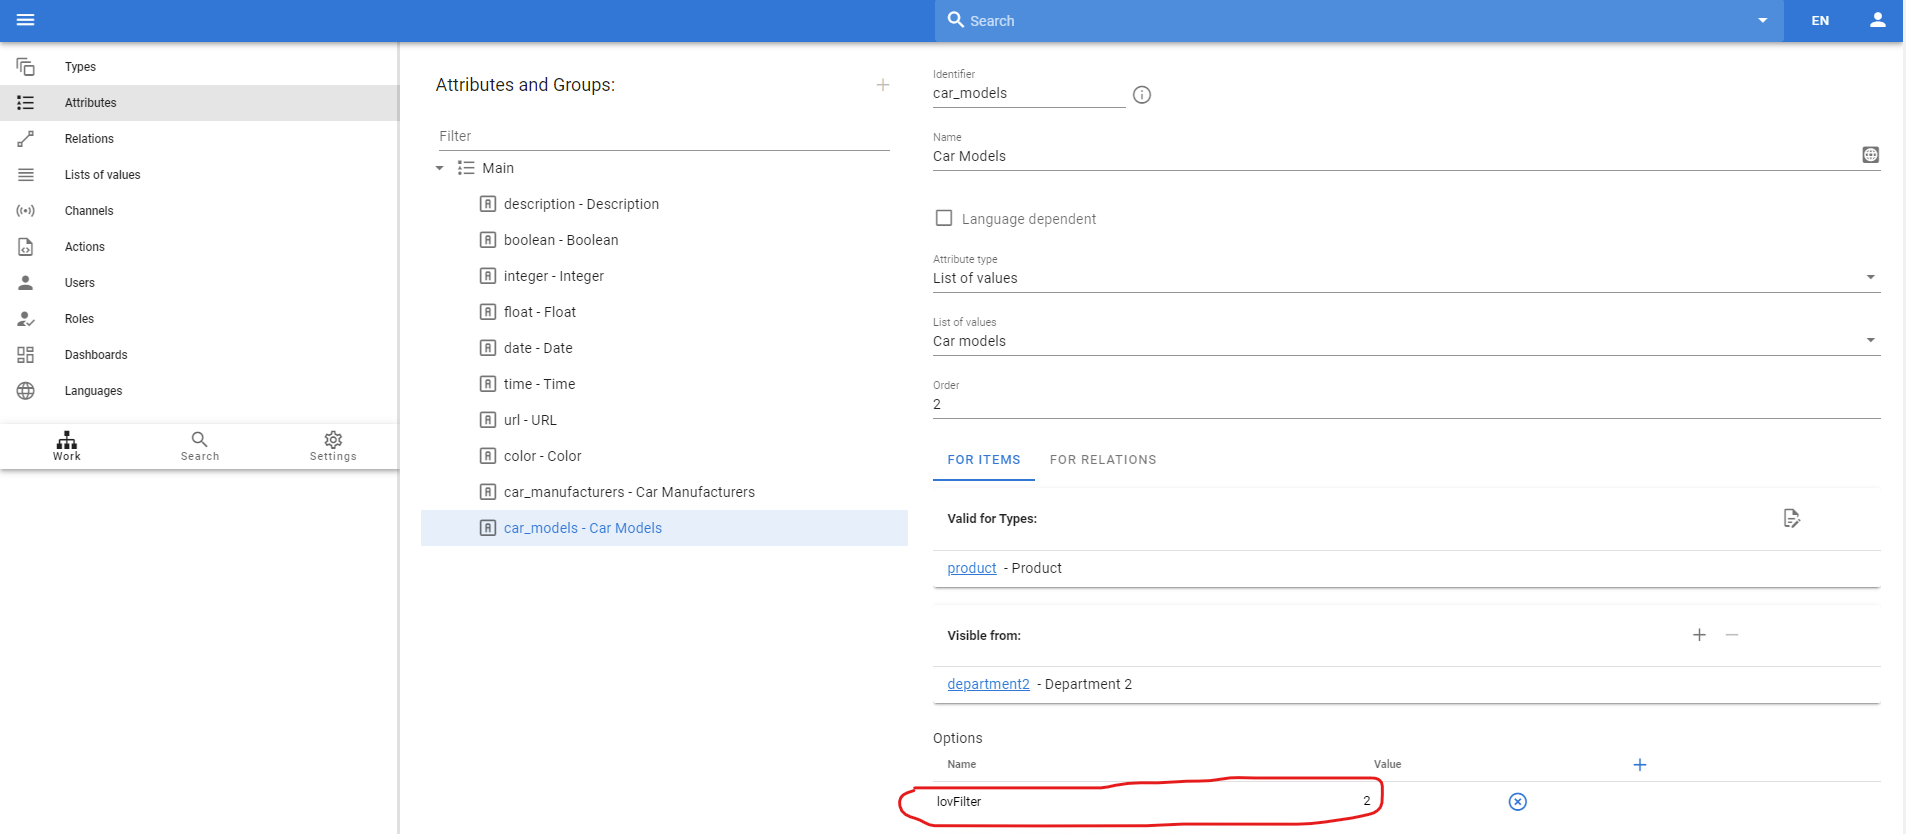
After that, when we select Mercedes-Benz in the first attribute, we will only see the corresponding values in the second.
Multivalued list of values
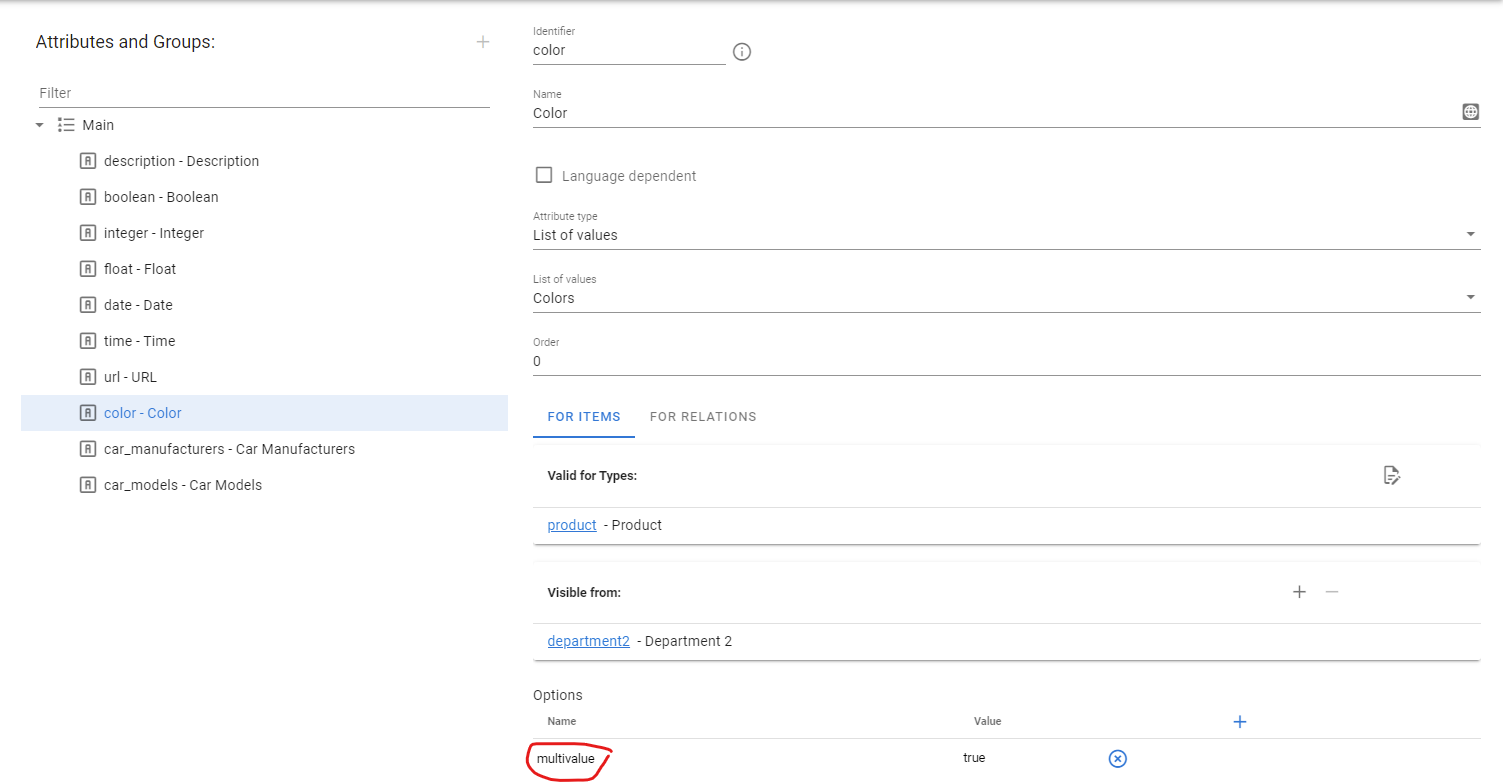
What if we have a product in different colors? For example, red + blue. In this case, we want to be able to select multiple colors for such a product.
This is easy, we have a Color list of values and a Color attribute. Let's go to the attribute and define the option multivalue=true.
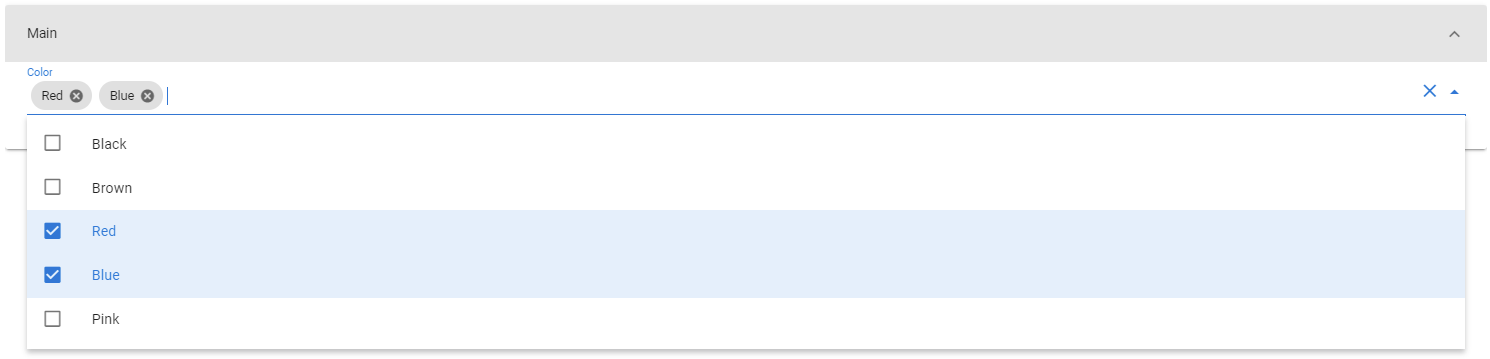
After this we will be able to select several values from the list instead of selecting only one value:
Attribute order
You can control the order of attributes inside attribute group by Order option. It determines in which order the attribute will be displayed in relation to the other attributes in that group. So, if you want to have a Description attribute first, then set the order to 1 and let the other attributes have a higher order.
Extended attribute validation
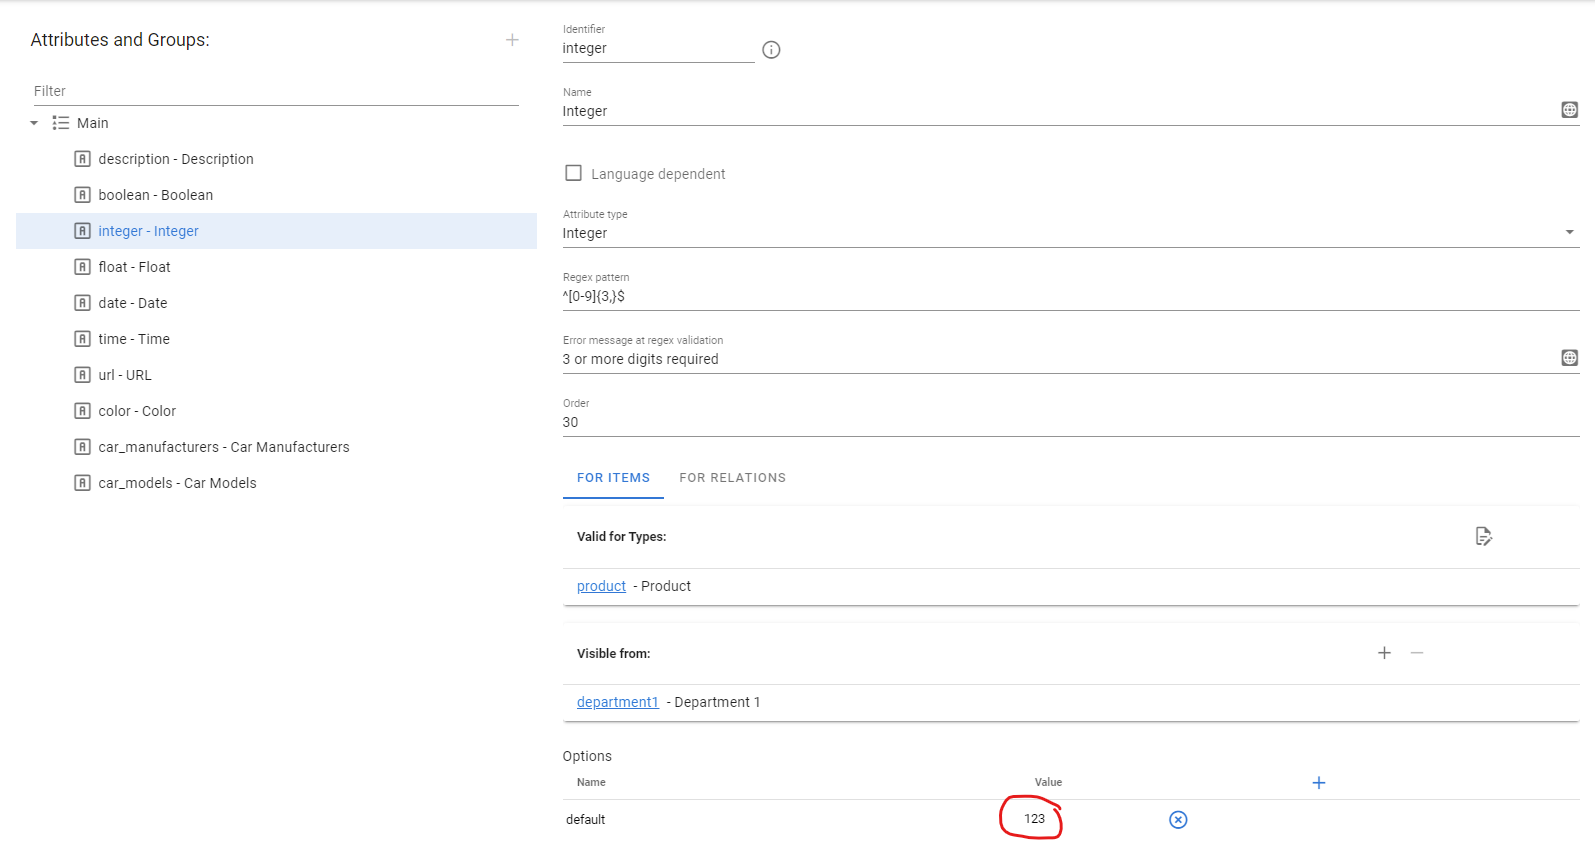
We have attribute types, so you can control what type of data an attribute can store. But what if you want the Integer attribute to be at least 3 digits long?
For this you have the Regex pattern option. Regexopen in new window is a special query expression that can check a string for some characters. You can read more about Regex hereopen in new window if you haven't worked with it before.
For example, this regexp tests a string for 3 or more digits: ^[0-9]{3,}$. Let's also add a Error message at regex validation, which is the text that will be displayed to the user in case of a regular expression error.

After that, the user will receive an error message if he tries to enter less than 3 digits.

Regex is a very powerful language and you can create very complex checks with it.
Attribute default value
If you want to set a default value for an attribute that will be assigned to it during object creation, you can set a default value in the attribute options.
Attribute in google like search
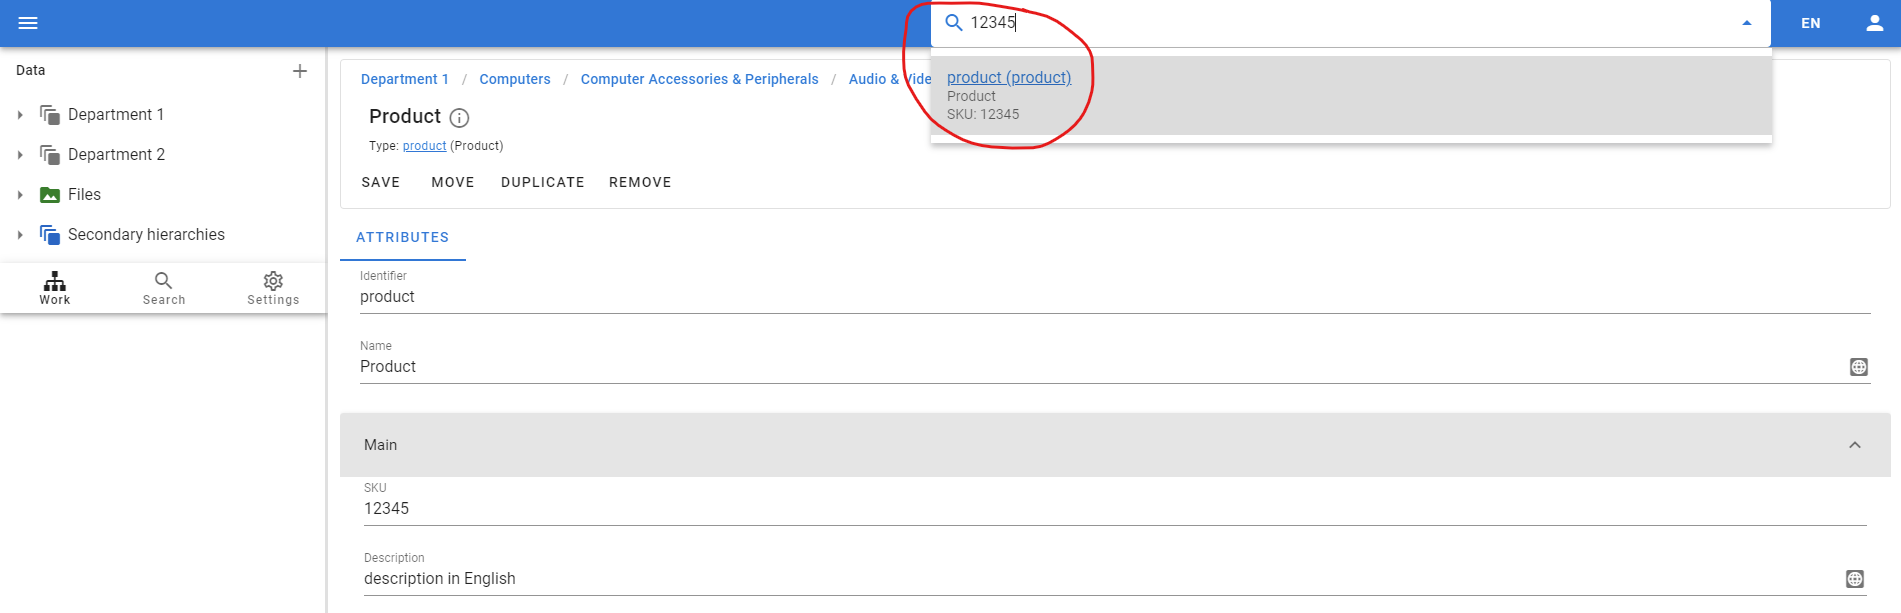
The system has a Google-style search that does a default search by object identifier and name. This way you can start typing the name or identifier of an object and navigate to that object easily.
But what if you have an attribute called SKU and you want to make it possible to search on that attribute? If you try to search on this basis, you won't find anything.
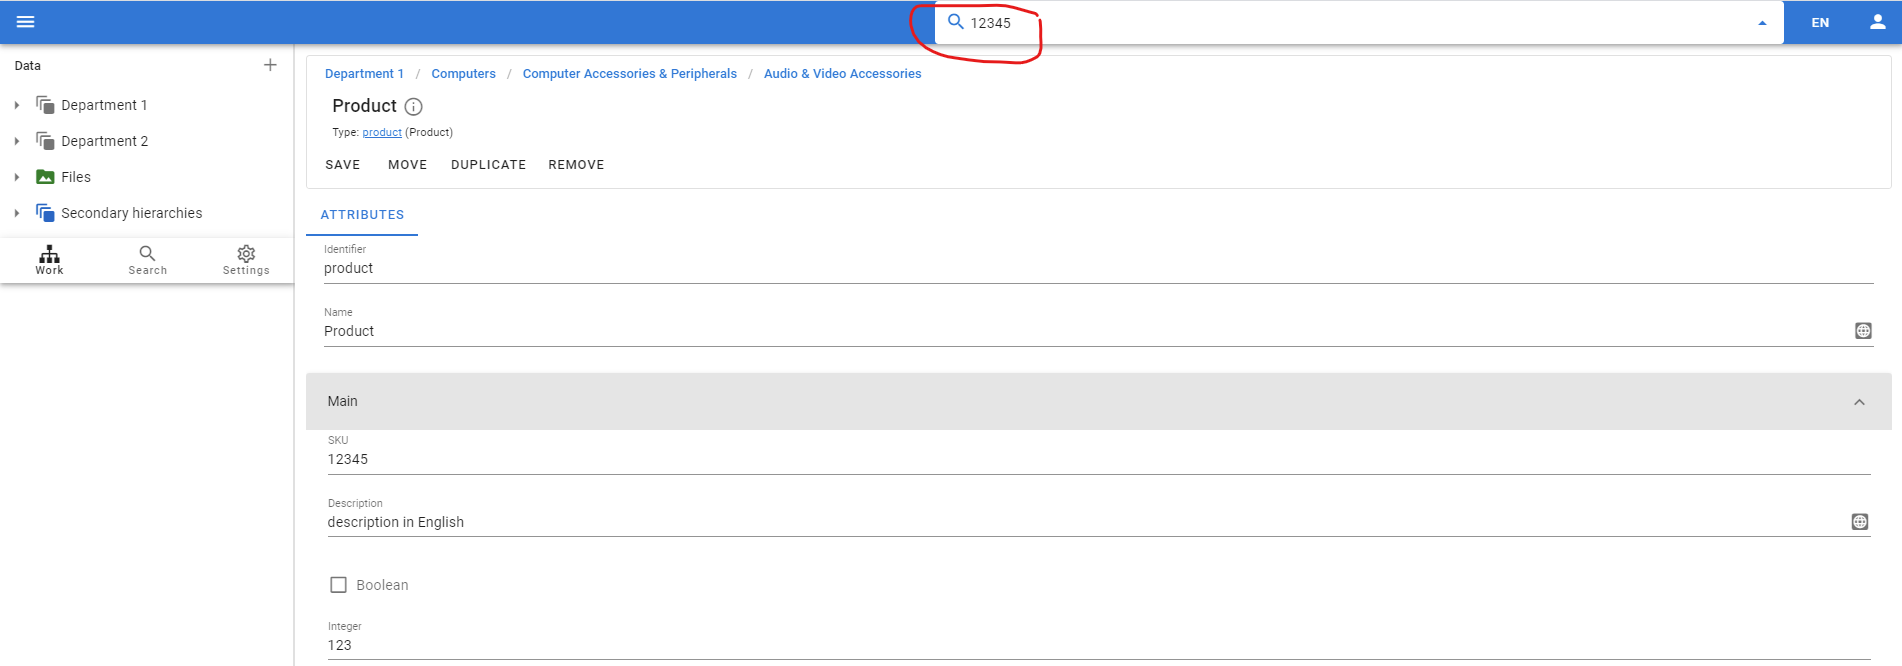
So should go to the attribute configuration and set a search=true value in the attribute options.
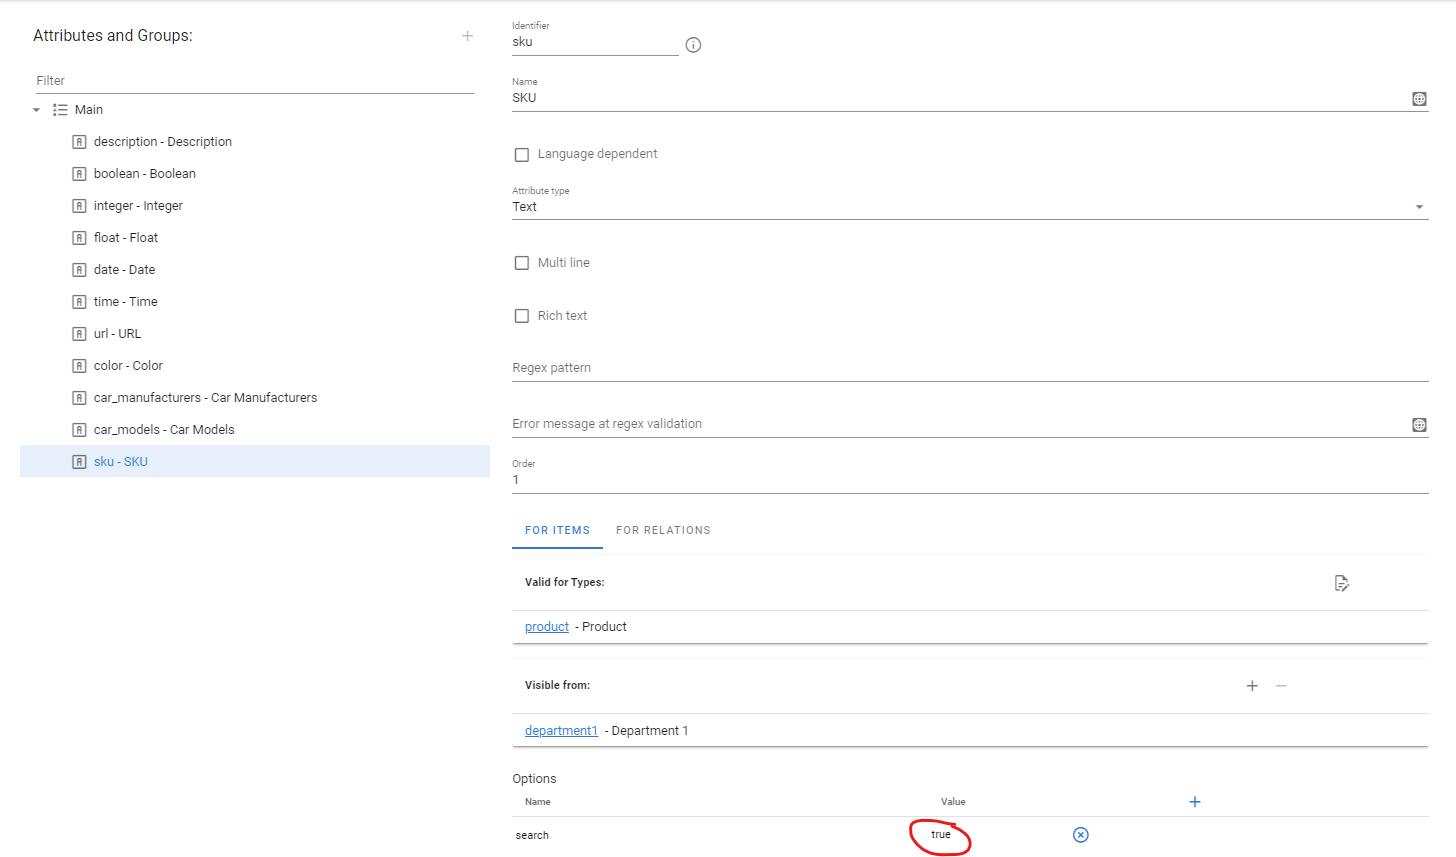
After that, you can also search by this attribute.
Attribute layout
By default, the attributes are arranged one after the other in a group. But you can specify how to arrange them on the screen.
We have divided the screen into 12 virtual columns, so if you only want this attribute to take up half of the screen, you can set cols to 6 in options.
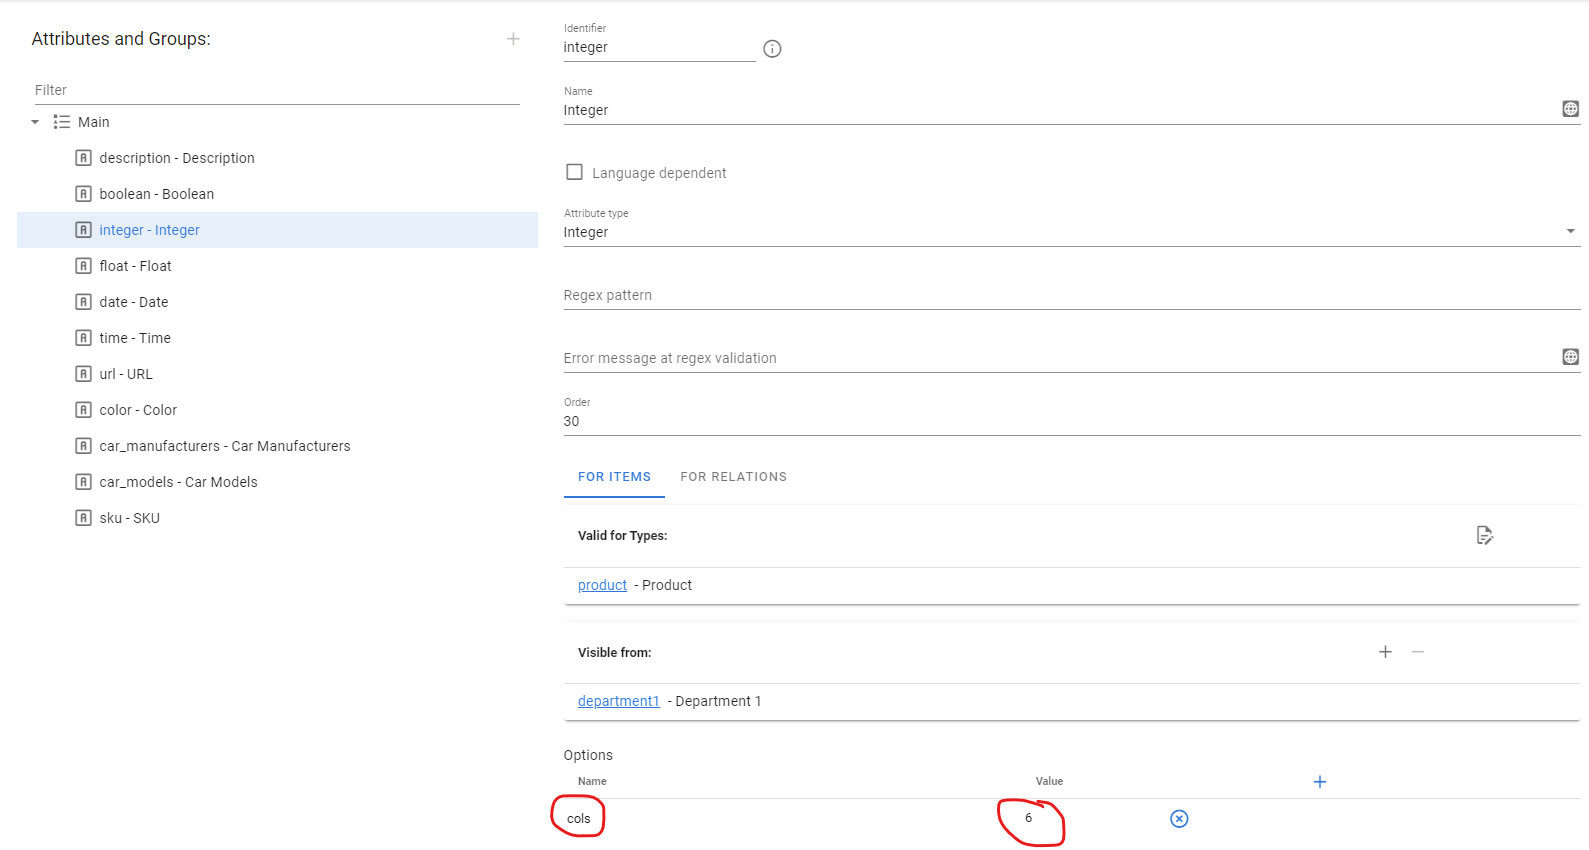
Let's do this for two attributes Integer and Float:

Now we have both attributes occupy half of the screen, but they have merged. Let's use the offset option to make a gap between them. The offset is also the number of virtual columns. But since we want to fit 1 column to offset, we have to shrink cols as well.
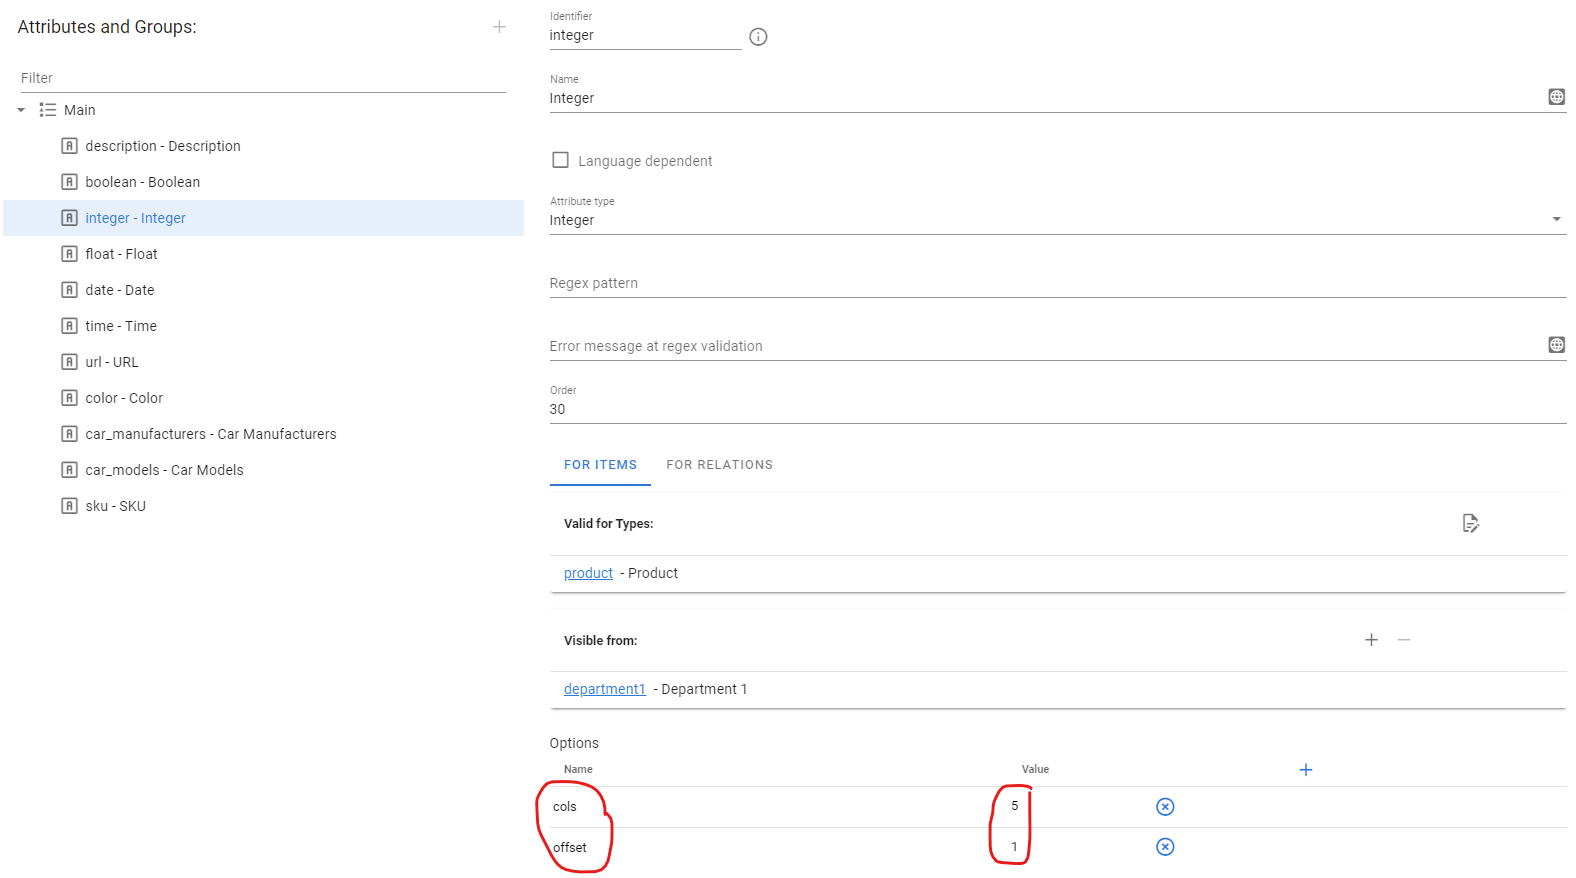
As a result, we get get the following:

You can also use the space option to set the free space after the attribute (instead of before, as offset does) so that you can get the following:

And you can specify CSS styleopen in new window with the help of style option.
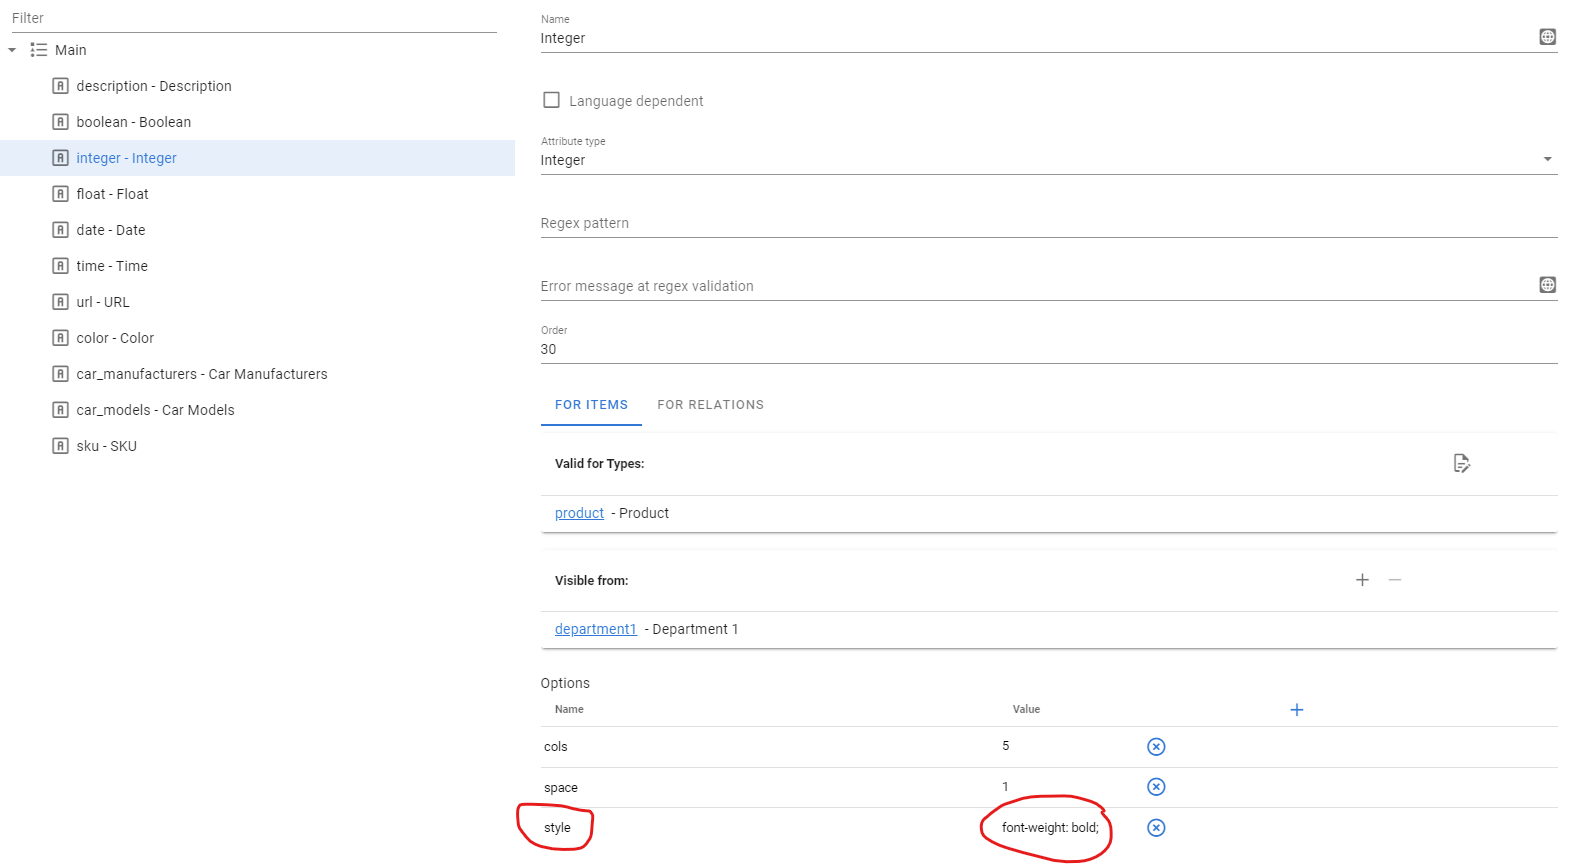
So this style will be applied to your attribute:

Attribute on relation
You can set an attribute not only for an object, but also for the relationship between them. Take a look at the Relations section for more details.
Dynamic visibility of attribute group
You can have a situation when you want to show some attribute groups dynamically based on the data itself. For example, you can have an attribute Blocked (as true or false) and if the product is blocked you want to hide some attribute group.
To do this, you can use the visible option of the attribute groups. This is an expression that will be evaluated when the product is opened, and the attribute group will be hidden if necessary.
Take a look at the corresponding section in System Customizationopen in new window.
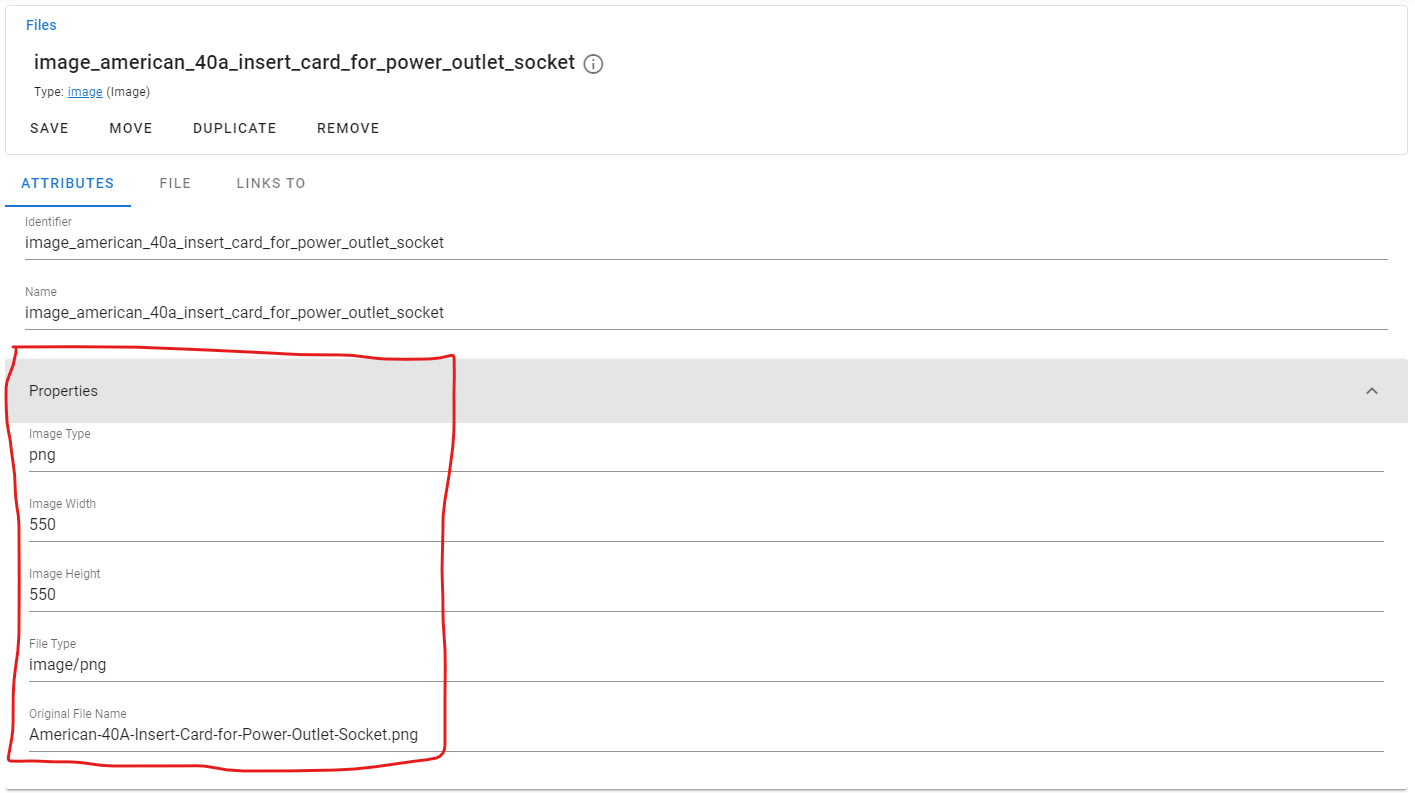
Automatic attributes for images and files
When you are uploading the file to the system, the following attributes will be generated:
- attribute with
file_typeidentifier (type: Text). This is mime type of the file. - attribute with
file_nameidentifier (type: Text). This is original file name.
Images has the following addition attributes:
- attribute with
image_typeidentifier (type: Text). This is type of the image (jpg, png, etc). - attribute with
image_widthidentifier (type: Text). This is width of the image. - attribute with
image_heightidentifier (type: Text). This is height of the image.
All of these attributes are created and filled automatically, you should only define such attributes with the appropriate identifiers, so see this data in the user interface.